Page 3 of 9 FirstFirst 12345 ... LastLast
Results 21 to 30 of 81

Thread: Ultimate Paint Details Summary Thread for an early 67S

  1. #21
    Senior Member
    Join Date
    Feb 2013
    Location
    Europe
    Posts
    614
    Quote Originally Posted by moito View Post
    not not true for most 305xxxS cars i have seen.

    do we know the with of the tape? i measured it for a project i did but i don`t remember...

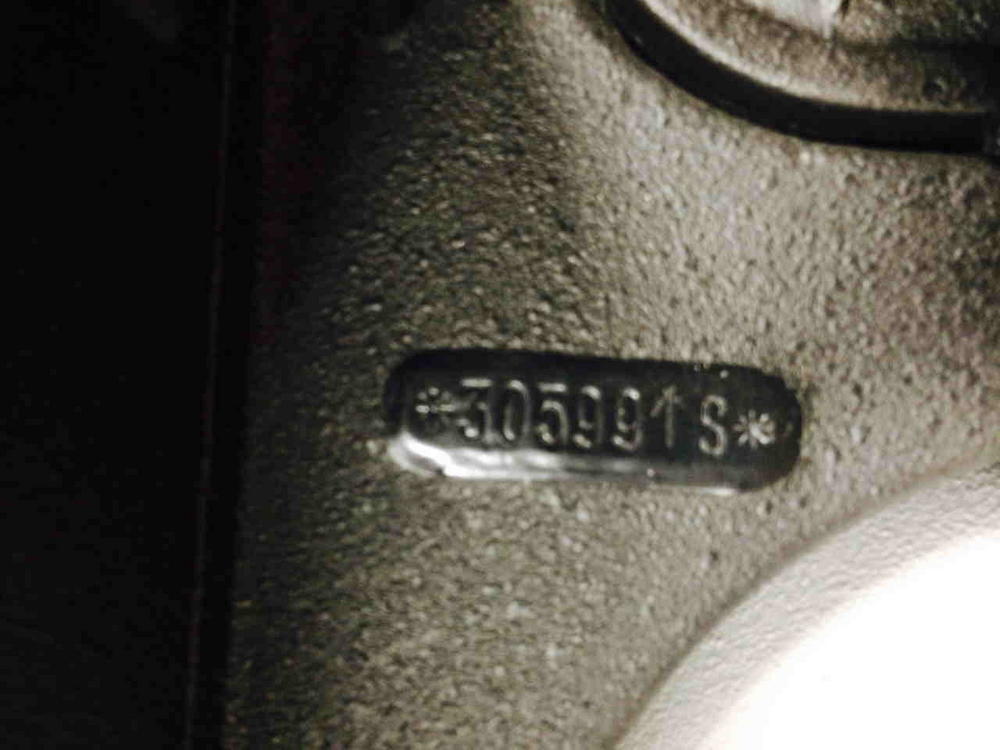
    Many thanks Frank, for your remark. That is very interesting, as my main concern is about a 305xxxS .
    I left 304192 on purpose in the chain, to expand the range of probable applicability.

    If you have seen multiple 305xxxS with uncovered VIN during underseal, that's an important remark.
    I have not the width of the tape. I would need to put the images next to the car to derive the width. Maybe others can measure on their car?

    I found also this one in the 305xxxS range, but that is a restored one a little bit in between both...

    Name:  40.jpg
Views: 901
Size:  69.8 KB
    Last edited by Adore911; 11-13-2018 at 11:47 AM.

  2. #22
    Senior Member
    Join Date
    Feb 2013
    Location
    Europe
    Posts
    614

    Luggage compartment - smugglers box cover

    According to the factory image in post 17, it looks like the smugglers box cover was closed during the application of the underseal, "masking" the smugglers box.

    This would also match with the pictures of the smugglers box when opened:

    Name:  1967%20911S%2032K%20Sithot.jpg
Views: 980
Size:  92.3 KB

    Name:  IMG_0324.jpg
Views: 977
Size:  129.8 KB

    Name:  IMG_1118.jpg
Views: 970
Size:  74.3 KB

    Name:  my67webasto.jpg
Views: 963
Size:  104.8 KB

    The smugglers box cover would then be opened while painting with black afterwards. That would match with the black paint in the smugglers box and on the underside of the smugglers box cover.

    This is a factory picture of an open smugglers box during black paint. Can also be from just tumbling around.

    Name:  IMG_4249.jpg
Views: 976
Size:  41.4 KB


    Contrary to the above sometimes fully covered surfaces are noticed. In this particular case likely due to the restoration:

    Name:  Carparc_Targa_29_1.jpg
Views: 938
Size:  141.1 KB
    Last edited by Adore911; 11-14-2018 at 12:31 PM.

  3. #23
    Senior Member
    Join Date
    Feb 2013
    Location
    Europe
    Posts
    614

    Luggage compartment - front inside masking

    The hinges for the front hood were covered with specific slide over protection during undersealing in the factory.

    As per Moito's advice, we would not cover the VIN before undersealing for a 305xxxS.

    The cover of the smugglers box is closed during undersealing.

    Next to that some other areas on the inside at the front panel seem often to be masked:
    • the area behind the relais at the front left corner
    • the areas around the two plugs to access the front bumper at both sides
    • the basis where the top of the wish washer bottle is mounted
    • the wish washer pump bracket (covered with black paint and felt afterwards)
    • the basis where the wish washer bottle rests (covered black paint and felt afterwards)
    • the hole to access the lower front latch from inside


    Is this also your experience or not? Did you see other areas masked for underseal in the luggage compartment? I am very curious about your remarks. Many thanks in advance.

    On some cars the underseal runs over the fender bolt heads until just under the hood rubber/seal rail. Bolts are finally covered with black paint in that case.
    On other cars the underseal breaks below fender bolts, at a masking line about 30 mm below the hood rubber/seal rail.

    What is (most) correct?


    Some pictures to support the above findings:

    Name:  Front inside left.jpg
Views: 931
Size:  71.9 KB

    Name:  Front inside right.jpg
Views: 927
Size:  53.9 KB

    Name:  IMG_2104.JPG
Views: 972
Size:  316.6 KB

    Name:  IMG_1480.JPG
Views: 925
Size:  177.8 KB

    Name:  IMG_4207.jpg
Views: 919
Size:  71.2 KB
    Last edited by Adore911; 11-14-2018 at 11:50 AM.

  4. #24
    Senior Member
    Join Date
    Feb 2013
    Location
    Europe
    Posts
    614

    Luggage compartment - under the dashboard

    Under the dashboard at the luggage compartment side, we often find underseal till the underside of the openings for the gauges/clock. Above that we see only black paint from the black sprayed after the underseal. Behind the gauges we find some polo red overspray from painting at the cabine side...

    These are pictures from my own car where the polo red outside was painted white. Don't mind the holes for the fog light switch and the Webasto heater switch, which were enlarged to fit electric mirrors . This is now all changed to off factory holes (only left and right for this Swedisch (Euro) car, no warning lights).


    Name:  IMG_7805.jpg
Views: 928
Size:  105.1 KB

    Name:  IMG_7773.jpg
Views: 920
Size:  98.7 KB

    Name:  IMG_7806 (2).jpg
Views: 929
Size:  56.1 KB

    Name:  IMG_7815.jpg
Views: 932
Size:  99.6 KB

    Name:  IMG_7767 (2).jpg
Views: 935
Size:  64.6 KB

    Name:  IMG_7752.jpg
Views: 921
Size:  70.5 KB

    Name:  IMG_7622.jpg
Views: 939
Size:  69.4 KB
    Last edited by Adore911; 11-14-2018 at 07:58 AM.

  5. #25
    Senior Member
    Join Date
    Feb 2013
    Location
    Europe
    Posts
    614

    Hood/Bonnet and fresh air grill

    Hinges

    Hinges were covered with slide over protection during the undersealing of the trunk.
    Hinges were painted / have overspray from painting the body.
    Final layer is black satin, also over the bolt heads.

    See pictures in previous posts above.

    Hood/bonnet

    The hood/bonnet is painted like the OUTSIDE of the car: at both sides in body color.

    However, the flat area residing between the frame is first covered with underseal.
    It seams that it was not done after masking the assembled hood.
    Sometimes you will notice that the underseal is applied till a few mm from where the hood frame and hood sheet meet eachother.
    In other places the underseal runs a bit under the outer hood frame.
    The above leads to the assumption that the underseal was applied on the panel/sheet before the outer frame was welded on.

    The hood must have been painted then at the end of the process.

    Some pictures will tell more than thousand words:

    Name:  hood.jpg
Views: 905
Size:  150.7 KB

    Name:  IMG_1319.jpg
Views: 911
Size:  64.5 KB

    Name:  IMG_4193.jpg
Views: 897
Size:  62.6 KB

    Name:  IMG_3805.jpg
Views: 900
Size:  75.4 KB

    Name:  SANY0096.jpg
Views: 908
Size:  107.3 KB

    Area on the body behind the fresh air grill

    On most cars this seems to be body colour.

    However, sometimes you will find black paint. This is obviously a picture related to a restoration:

    Name:  Porsche-911-2_0S-1967-76.jpg
Views: 916
Size:  229.9 KB
    Last edited by Adore911; 11-14-2018 at 08:15 PM.

  6. #26
    To add a detail to the hinges, the clips (silver zinc plated) holding the wiring to the hinges were hand touched up black as are the bolts. The touch up is not perfect!

    On my December '65 car the horn grill are was touched up by brush and again, they work was not perfect/ did not cover the whole area.

  7. #27
    Senior Member
    Join Date
    Feb 2013
    Location
    Europe
    Posts
    614
    Quote Originally Posted by 718RSK View Post
    To add a detail to the hinges, the clips (silver zinc plated) holding the wiring to the hinges were hand touched up black as are the bolts. The touch up is not perfect!

    On my December '65 car the horn grill are was touched up by brush and again, they work was not perfect/ did not cover the whole area.
    Thanks for the addition. Your remark related to the clips matches 100% with the clips in my car, which I believed to be 100% original (second picture in this post shows the rear hinges). The horn grill area in the fender and the inner part of the fender close to the A pillar are indeed brushed with black paint.

  8. #28
    Senior Member
    Join Date
    Feb 2013
    Location
    Europe
    Posts
    614

    Floor, rocker line and inner rear fender paint on a 67S

    In the factory, the underseal, on the floor (incl. under the seats and on the suspension pan) outside, is applied on bare metal.

    It seems that following 3 step approach is applied at the long sides of the car:
    1. the underseal seems to be applied on the floor till the edge of the floor
    2. the body is painted on the sides till the edge of the floor
    3. then a strip of thinned underseal/black paint is applied between the edge of the floor and a line that runs just above the jack points


    Because of that, you will note some paint overspray on the underseal in the inner fender, once the final layer satin black paint has gone.

    Name:  Rocker line yellow 67S coupe_text.png
Views: 867
Size:  582.2 KB

    Name:  IMG_1352.jpg
Views: 857
Size:  66.2 KB

    Name:  Rocker%20line%20yellow%2067S%20coupe_3.png
Views: 859
Size:  591.5 KB

    Name:  Rocker%20line%20307853%20Normal.jpg
Views: 860
Size:  62.0 KB

    Name:  IMG_0148.JPG
Views: 879
Size:  132.1 KB

    Name:  IMG_2356.jpg
Views: 876
Size:  51.8 KB

    Name:  IMG_4260.jpg
Views: 858
Size:  122.9 KB
    Last edited by Adore911; 11-15-2018 at 08:51 AM.

  9. #29
    Senior Member
    Join Date
    Feb 2013
    Location
    Europe
    Posts
    614

    Painting doors in 1967

    The doors seem to go through a 3 step process:

    1. doors are sprayed inside with a cloudy sound deadening material against the backside (=the inner side of the door, the most at the outside of the car) only with some splashes to the side where the lock is mounted. Not sure whether this is also the same underseal sprayed more closely to the surface.
    2. doors are painted in body colour at all sides
    3. the edges inside the car are covered with black satin paint (except for a strip on top), applied bu brush (on some cars, even original, it seems to be sprayed)


    My original door (with xxxS stamp) with the original polo red inside.

    Name:  IMG_7377.jpg
Views: 882
Size:  94.8 KB

    Name:  IMG_7387.jpg
Views: 879
Size:  69.5 KB

    The brushed satin black edges:

    Name:  DSC06793.jpg
Views: 882
Size:  306.4 KB

    Name:  IMG_4223.jpg
Views: 891
Size:  68.5 KB

    Name:  IMG_0580.JPG
Views: 876
Size:  117.4 KB

    Name:  IMG_0586.JPG
Views: 888
Size:  109.0 KB

    Name:  IMG_0588.JPG
Views: 879
Size:  91.3 KB

    Here it deels to be rather sprayed:

    Name:  IMG_4314.jpg
Views: 884
Size:  110.2 KB

    Name:  IMG_4348.jpg
Views: 885
Size:  85.3 KB
    Last edited by Adore911; 11-14-2018 at 08:20 PM.

  10. #30
    Senior Member
    Join Date
    Feb 2013
    Location
    Europe
    Posts
    614

    Painting front fenders in 1967

    The front fenders seem to go through a 3 step process:


    1. on the inside, the part going from the blinkers/headlight till the fender joining panel (panel at front side included) is covered with underseal
    2. the outside of the fender and on the inside, the part going from the fender joining panel (panel at door hinge side included) till the edge, are painted like the outside body
    3. two parts are brushed with black satin paint

    a/ the part going from the fender joining panel (panel at door hinge side included) till the edge at the door hinge side, is brushed with satin black
    b/ the area behind the horn grill is brushed with satin black

    (during a restoration we will use 2k epoxy to start, a 2k primer and we will cover the underseal also with 2k (satin) black).

    Some pictures of the 3 steps:

    Step 1:

    Name:  Step 1.jpg
Views: 878
Size:  64.1 KB

    Step 2:

    Name:  Step 2.jpg
Views: 876
Size:  27.4 KB

    Step 3a:

    Name:  Step 3a.jpg
Views: 876
Size:  71.0 KB

    Step 3b:

    Name:  Step 3b.jpg
Views: 865
Size:  119.2 KB

    Final result after years put on the floor:

    Name:  Final.jpg
Views: 873
Size:  63.2 KB

    Final result mounted on the car:

    Name:  Final mounted.JPG
Views: 877
Size:  83.6 KB
    Last edited by Adore911; 11-14-2018 at 08:23 PM.

Tags for this Thread

Posting Permissions

  • You may not post new threads
  • You may not post replies
  • You may not post attachments
  • You may not edit your posts
  •  

Message Board Disclaimer and Terms of Use
This is a public forum. Messages posted here can be viewed by the public. The Early 911S Registry is not responsible for messages posted in its online forums, and any message will express the views of the author and not the Early 911S Registry. Use of online forums shall constitute the agreement of the user not to post anything of religious or political content, false and defamatory, inaccurate, abusive, vulgar, hateful, harassing, obscene, profane, sexually oriented, threatening, invasive of a person's privacy, or otherwise to violate the law and the further agreement of the user to be solely responsible for and hold the Early 911S Registry harmless in the event of any claim based on their message. Any viewer who finds a message objectionable should contact us immediately by email. The Early 911S Registry has the ability to remove objectionable messages and we will make every effort to do so, within a reasonable time frame, if we determine that removal is necessary.