Page 6 of 37 FirstFirst ... 4567816 ... LastLast
Results 51 to 60 of 366

Thread: My Martini RSR build project

  1. #51
    Senior Member patrick911's Avatar
    Join Date
    Mar 2007
    Location
    Melbourne, AUS
    Posts
    529
    The chassis is back at the workshop and that pressing has already been removed I'm told. There were also a few more air-conditioning holes that require fixing, as well as a matchbox sized hole in the dash that shouldn't be there.
    Spoke too soon on the rust part though.
    The inner left fender panel (Pelican calls it a 'front fender jamb joining plate' i believe) looks like it's been targeted with a shotgun

    Name:  IMG_3284 - small.jpg
Views: 1048
Size:  46.2 KB

    All things considered, this is still very minimal. Still very happy with the outcome.
    Last edited by patrick911; 08-21-2019 at 03:38 PM. Reason: spelling

  2. #52
    Senior Member Darren65's Avatar
    Join Date
    Aug 2011
    Location
    UK
    Posts
    1,118
    The shell looks perfect Patrick and the above is more of blemish than rust! Great result!

    ....just looked back at mine and we'd actually removed the pressing but had missed the curve that differs on the later panels!

    Quote Originally Posted by Darren65
    .....


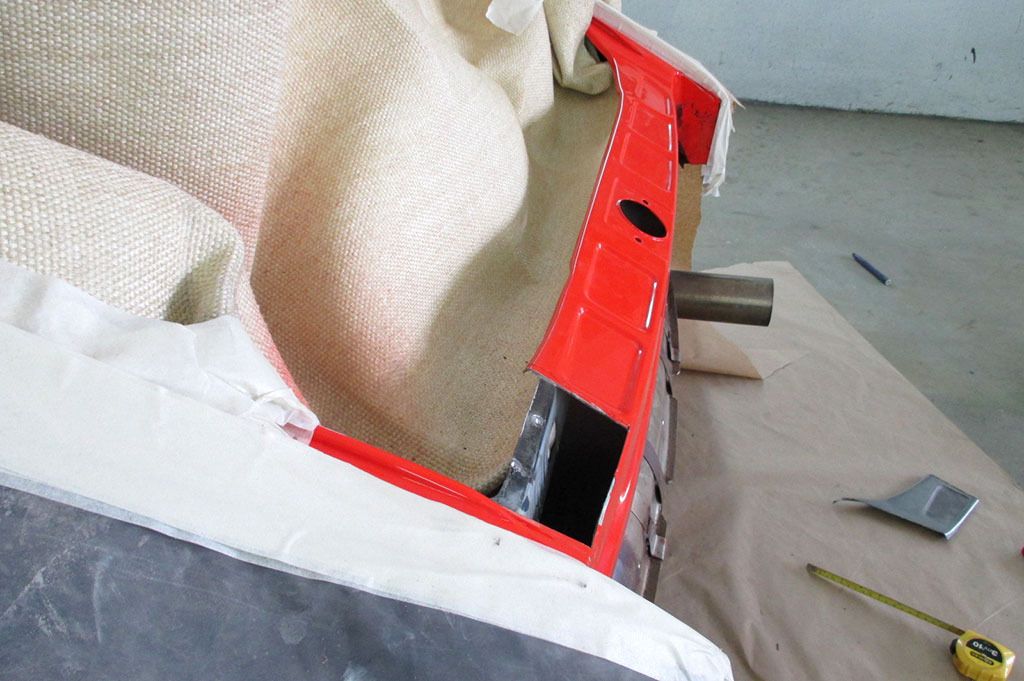
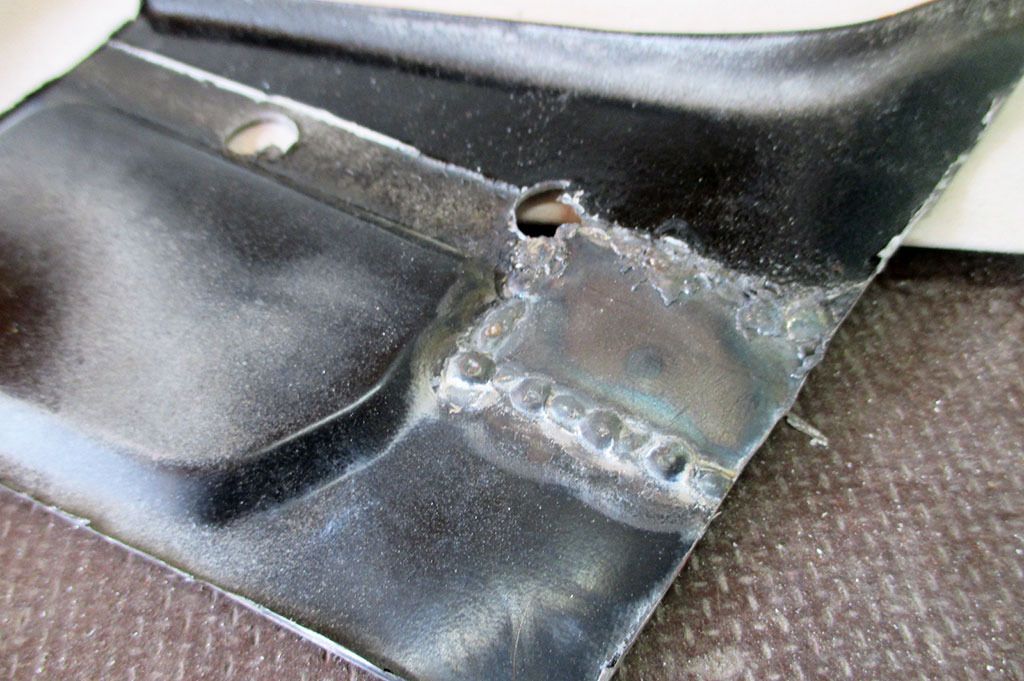
    ...from a little research I've concluded the rear slam changed in 74 (edit: actually late Spring 73) with a small rectangular outward pressing to the left which also altered the left sticker pressing shape which mirrored the pressing on the right until then. The actual curves of the panel remained the same shape as the earlier cars until 78 SC's which they then became more angular. These 78 style panels are the ones that are sold today. The lozenge shape outward pressing is the most obvious sign of a later panel, you can see that Barry had always at least removed these....


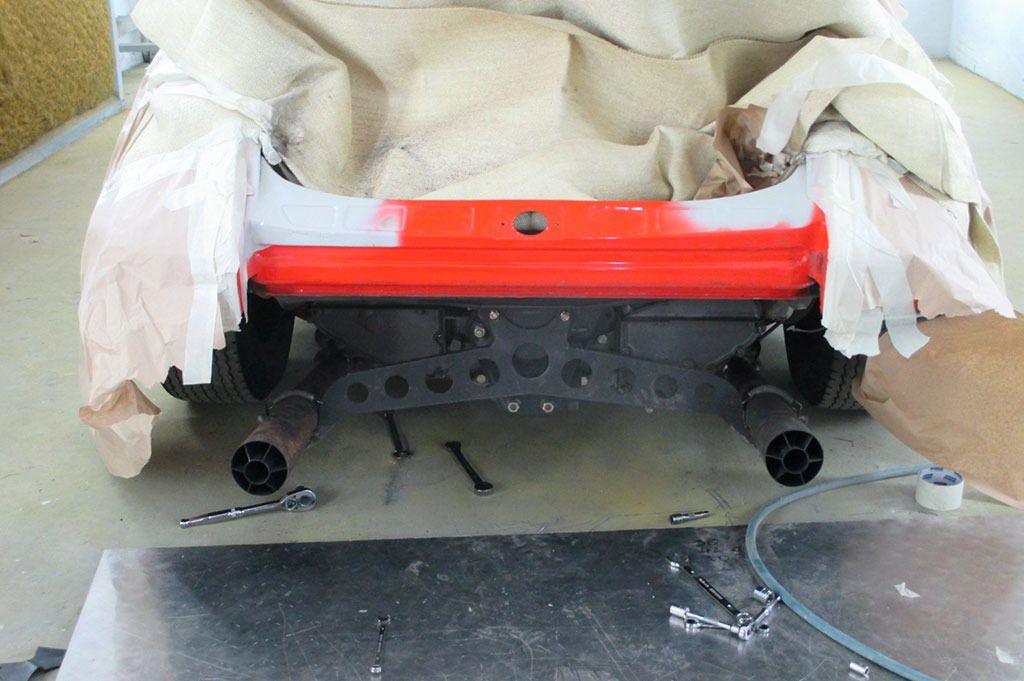
    ....a bit of welding, metal work and paint....


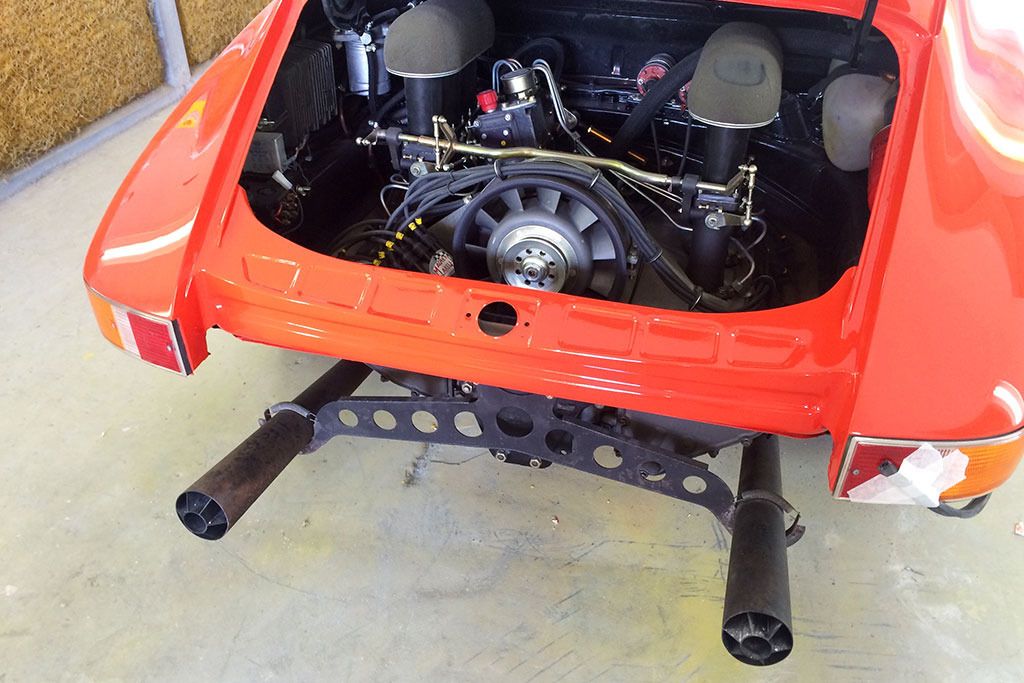
    ....and now looking just like a 72 car should ....


    And there you go.....finally finished!

    Cheers,

  3. #53
    Senior Member patrick911's Avatar
    Join Date
    Mar 2007
    Location
    Melbourne, AUS
    Posts
    529
    Thanks Darren,

    I think I got it now.
    So up to somewhere in 1973 the panel is as yours depicted above, then from 73 to 78 the edges/corners remain but it has this pressing and different left sticker pressing shape, then from '78 onward the actual angles of the edges get sharper.
    Took me a while to find a good picture of what mine looked like, but if I understand correctly it's not just the rectangular pressing (now removed) but also the angle as highlighted below:

    Name:  IMG_1645 - small.jpg
Views: 1000
Size:  96.1 KB

    That's going to be a pain to fix

  4. #54
    Senior Member patrick911's Avatar
    Join Date
    Mar 2007
    Location
    Melbourne, AUS
    Posts
    529
    Question for the brains trust/dashboard-police.

    Konradsheim's book on the Carrera RS states that the Martini RSRs had 'needle caps on dials taped over to prevent glare' and that the 'dashboard panel had a felt covering' for the same reason.
    I can't find historic pictures of R6 that show the felt covering on the dash, but there's pictures from back in the day of the Samson RSR and R7 sister Martini car that both clearly visibly have it.
    The recently restored R6 Martini car however does have the correct standard F-series dashboard and no felt covering.
    What's correct?
    Anyone have a picture of the Targa Florio winning car at the time that shows the dashboard?

    The reason I'm asking is that some of the dashboards for sale (now Lakewell is no longer making 'm) have the hex speaker pattern or the wrong hide-pattern.
    If being period correct means covering with felt, I obviously don't have to search for a hard to find correct dash.

    Pictures of R7 and the Samson RSR:
    Name:  DSC_0053_R7.jpg
Views: 946
Size:  91.6 KBName:  Samson car.jpg
Views: 935
Size:  115.4 KB

    Picture of the restored R6 car:
    Name:  33_R6.jpg
Views: 932
Size:  71.0 KB
    Member #3508
    1973 911 2.4T
    1976 911S -> 2.8RSR replica
    "if nothing goes right, go left!"

  5. #55
    The hex issue is straight forward to address. I made a template of the missing corners from the existing holes. Then located it using three dowels and carefully drilled out the corners. Piece of cake; just time and patience.
    Steve Shea #1 joined a long time ago
    58 speedster
    66 912
    67S
    73S
    97 VW eurovan
    1132 honda snowblower

    member Jackson Hole Ski Club

  6. #56
    Senior Member patrick911's Avatar
    Join Date
    Mar 2007
    Location
    Melbourne, AUS
    Posts
    529
    Thanks Steve - that's a good point. Didn't even think of that
    Member #3508
    1973 911 2.4T
    1976 911S -> 2.8RSR replica
    "if nothing goes right, go left!"

  7. #57
    The samson pic is a 3.0ltr g series not the 2.8 by the looks of it.

  8. #58
    Senior Member
    Join Date
    Sep 2009
    Location
    UK
    Posts
    2,701
    From the cars i have seen, i would say needlefelt on the dash. If you need some, i probably have enough of the correct distinctive punched felt to do your dash.

    Great project Patrick. Very enjoyable read.

  9. #59
    Senior Member patrick911's Avatar
    Join Date
    Mar 2007
    Location
    Melbourne, AUS
    Posts
    529
    So the car is now in epoxy after been media-blasted and back at the workshop.
    I took a day off last week to start the big job of sanding. To my surprise there were still bits of underside 'schutz' protection left on the chassis; looks like the plastic/glass max used to blast the car did still not manage to cut through this stuff...
    Anyway, 8 hours later, still only the underside panels have been sanded. there's at least two to 3 days left before we can use filler and sand some more.

    Name:  IMG_3393a.jpg
Views: 854
Size:  64.2 KBName:  IMG_3402.jpg
Views: 862
Size:  103.0 KB

    Name:  IMG_3407a.jpg
Views: 818
Size:  77.9 KBName:  IMG_3422a.jpg
Views: 847
Size:  48.3 KB

    The good news is that my search for special parts has made some good progress. Clyde, who's just about to complete his immaculate viper green ST, decided a while back to use carbs on his car, but he collected a lot of the required MFI parts.
    So I managed to buy his MFI fuel injection pump. And whilst he was searching his treasure trove attic, he also managed to find a few other important bits & pieces. Watch this space!

    Name:  Boyers STpump2.jpg
Views: 837
Size:  61.9 KBName:  IMG_3425.jpg
Views: 847
Size:  266.4 KB

    Oh, and after studying a lot of the interior pictures, I managed to find a company in Germany that sells original Bosch 'zug-schalters', the little switches that are used on the RSR (and some STs) to individually activate the CDIs.
    It's little successes like this that make the journey so much fun.
    Member #3508
    1973 911 2.4T
    1976 911S -> 2.8RSR replica
    "if nothing goes right, go left!"

  10. #60
    Senior Member patrick911's Avatar
    Join Date
    Mar 2007
    Location
    Melbourne, AUS
    Posts
    529
    I'm still busy sanding the car with 240 grit to prepare it for priming and paint, and as people that done this before will know - it's a big job.
    I've spent two full days now and I've only completed the full under side of the car. I reckon there's at least 3 or 4 more days to go.
    But that's not a bad thing - after a big week in the office it's very relaxing and rewarding to work on the car again.

    Name:  IMG_3435.jpg
Views: 777
Size:  99.4 KBName:  IMG_3436.jpg
Views: 770
Size:  65.2 KB

    In the mean time, there's still a few metal work jobs that need completing.
    The RSR has oil lines on the left side of the body (for the transmission serpentine cooler), so we need to replicate the gusset plates as they're done on the right hand side.
    Jason also needed to put the brackets on for the shortened trailing arms, which is a bit of a pain to weld in place, so parts of the rear seats had to be temporary cut out to get access and weld all sides.
    The seat brackets for an -F-series are next, as is the hole in the front right wheel-arch to get the oil lines into the front compartment.
    Some other small bits, like the footrest are also on the list, and finally, we ran into some pictures of RSRs on Pbase that showed another reinforcement we weren't yet aware off.

    It looks as RSRs 0328, 0782 and R6 (0588) all have an additional piece of sheetmetal welded onto the spring plate mounting point.
    I don't think I really need it as I'm not planning on racing the car, but to be correct to the original we'll need to put these springplate reinforcements on as well.

    Name:  IMG_0782.jpg
Views: 787
Size:  47.7 KBName:  IMG_3443.jpg
Views: 774
Size:  50.3 KB
    Spring plate reinforcement on 0782 and how it looked on my donor car

    Name:  IMG_3447.jpg
Views: 747
Size:  66.6 KBName:  IMG_3448.jpg
Views: 784
Size:  69.9 KB
    Member #3508
    1973 911 2.4T
    1976 911S -> 2.8RSR replica
    "if nothing goes right, go left!"

Posting Permissions

  • You may not post new threads
  • You may not post replies
  • You may not post attachments
  • You may not edit your posts
  •  

Message Board Disclaimer and Terms of Use
This is a public forum. Messages posted here can be viewed by the public. The Early 911S Registry is not responsible for messages posted in its online forums, and any message will express the views of the author and not the Early 911S Registry. Use of online forums shall constitute the agreement of the user not to post anything of religious or political content, false and defamatory, inaccurate, abusive, vulgar, hateful, harassing, obscene, profane, sexually oriented, threatening, invasive of a person's privacy, or otherwise to violate the law and the further agreement of the user to be solely responsible for and hold the Early 911S Registry harmless in the event of any claim based on their message. Any viewer who finds a message objectionable should contact us immediately by email. The Early 911S Registry has the ability to remove objectionable messages and we will make every effort to do so, within a reasonable time frame, if we determine that removal is necessary.