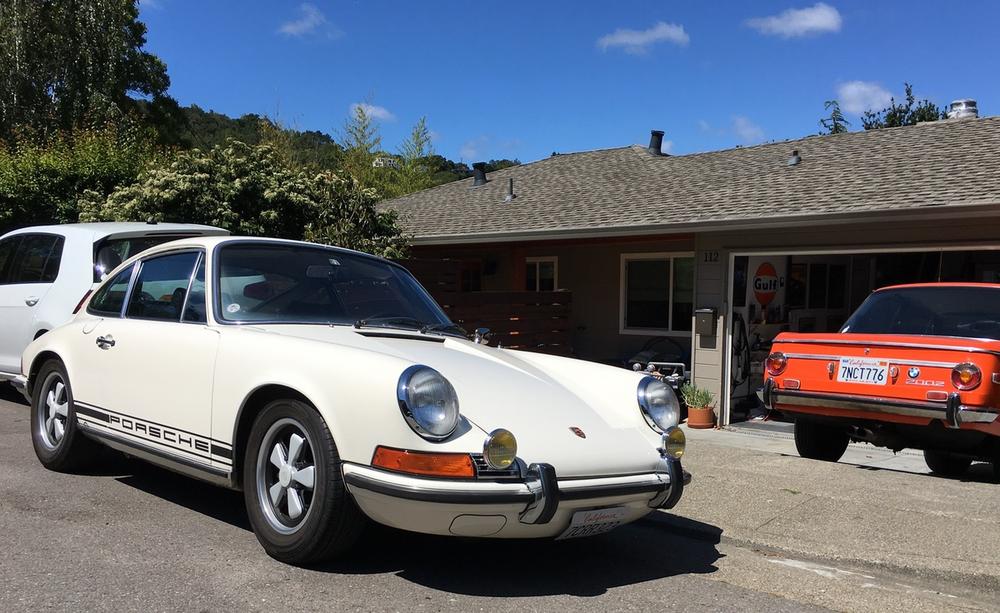
This is a TTG driving lights write up for people with 2 left thumbs. They're offered by Eric's foreign auto, these things are jewels and super fairly priced in this era of crazy expensive parts. There is a thorough writeup out there including electrical (http://www.912bbs.org/vb/entry.php?1...ing-TTG-lights), but I wanted to add a few tips just on the mounting for guys with 2 left thumbs like me...
In no particular order:
- I believe the pivot mount for the lights is side specific - or I was very tired last night - probably obvious if you deal with this often but otherwise, not so much. The angle of the mount allows them to point straight - get it wrong and they are pointing slightly to the side of the road. Which you may realize *after* you installed the whole shebang and threaded all the bolts. Like I did.
- You need more parts, specifically brackets, bolts and washers. Unlike the cheap kits that tighten around the slats of the grill and put strain on the grill attachments, this is a very solid mount on the battery box wall but you need the brackets. Stoddards sells them for $22 each. (901-631-137-02 Fog or Driving Light Bracket for 911 or 912 1969-1973). The mount holes on those are threaded and therefore you need the right size bolts. Poke in you bolt bucket and see what works - 10mm long is plenty but they can be longer, there's room. In my case I found I had a set of hex bolts that I think came from the seat rails of another 911, plus 4 washers...
- The unit must be assembled outside the car, including tightening all the adjustments because after the fact you will not be able to reach in unless you have triple jointed fingers and miniature allen keys. It helps to use some painter tape where stuff might rub. Which brings me to the spacer issue: Eric kindly provides a long metal spacer (missing on the right arrow) that allows the light to protrude a little more from the grill. He recommends its install. In my case I found out that the "hinge' at the bottom of the lamp would hit the bottom of the grill - but that is probably because at the time I had the lights reversed. Still the fumble gave me a chance to look at both options side by side and I prefer the "no spacer" look. You just need a deep 17mm socket. IMO, both options are equally impossible to adjust once installed, and the no spacer look hides the attachment gear better.
Fumbles gave me an opportunity to do the install 3 times on that side, once for removing the spacer, once for the wrong side headlight plus extra tightening, once final - I got good, can do it 5 minutes per side now ;-)
Actual install:
1) assemble the whole thing outside the car, thread the lamp bolt through the grill and into the bracket. Tighten so that everything is straight and tight, you won't get another chance. Lamp to bracket + lamp pivot point both tight.
Pull your grills and batteries. You will find 2 plugs on the front part of the battery box, one visible from the grill opening and one on top of the box. The plugs pop out and then magically disappear forever in the recesses of the car. They're probably worth $500 each ;-)
Now trust me on this because I did it 4x in a row, the easiest way is to attack the top bolt first. Thread the whole assembly into the grill opening by rotating it 90 degrees - only works one way. Position it close and insert the top bolt from inside the battery. Now you can fumble around with no visibility but by feel you can sense the bracket touch the top bolt and that guides you. Curse, find the hole, thread it in but don't tighten too much...
Now you can do the front one, which is easier because you can see it. From inside the box again thread a bolt using your 8-fingers-hand to also shine a flashlight there - you can see the bracket hole this time.. don't tighten too much yet, make sure the grill is not pinched by the lamp assembly and is positioned ok. Now tighten the bolts, and then the grill last... Solid !
Loose grill here:
again, I went with no spacer. It cleared the grill opening better and I like how the lamp "hugs" the grill and hides the fact that the grill is cut out... Super nice part, as ever from Eric.


 Reply With Quote
 . 1970 ex-Southern Californian LHD Conda 911T
  1955 Series 1 86" Land Rover (original Australian CKD … very slowly re-building)
 1987 W124 230e