Page 1 of 4 123 ... LastLast
Results 1 to 10 of 34

Thread: S-Caliper Restoration Step by Step

  1. #1
    Senior Member Neunelfer's Avatar
    Join Date
    Dec 2002
    Location
    Sandy, Utah
    Posts
    1,511

    S-Caliper Restoration Step by Step

    I could just hear you guys begging for another step by step.

    Time to show the inner workings of the famous (and my favorite) S-Caliper. Over the next few weeks we'll splay out MarkS's S-Calipers. The au(to)topsy should prove benificial for those who want to tackle the task of restoring a pair of these cool calipers.

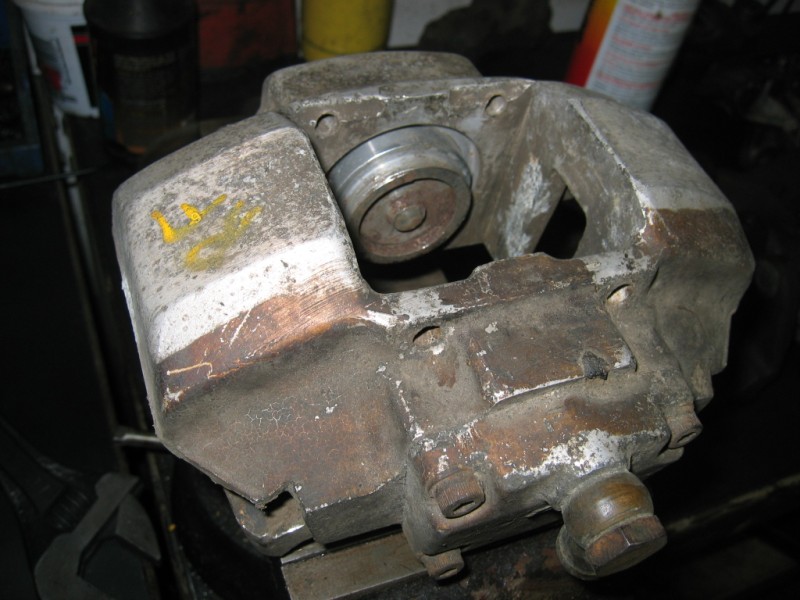
    The subject:


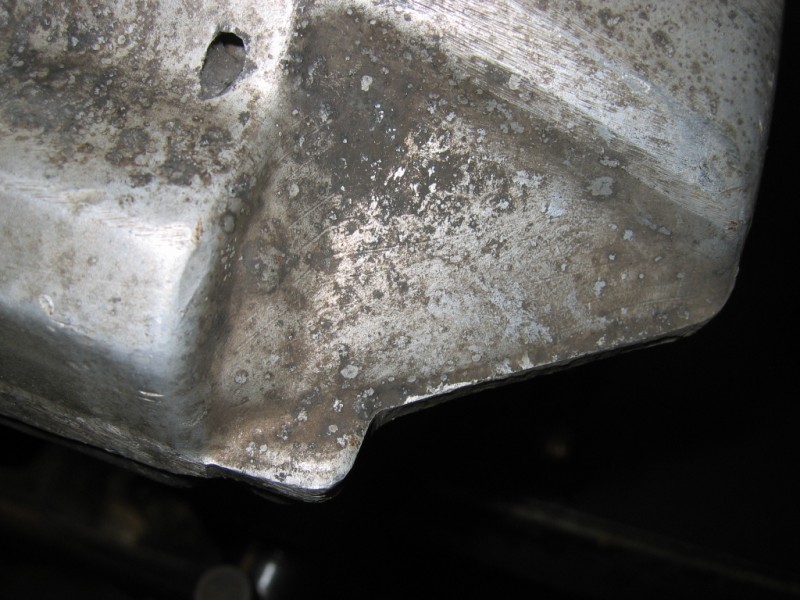
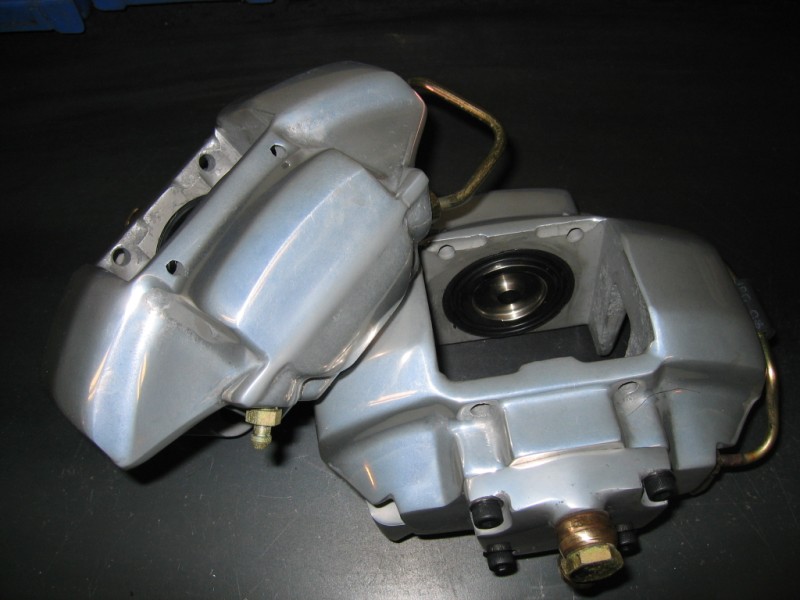
    One pair of pretty grundgy old S-Calipers. These are the correct old variety that I've coined the "Bat-Wing" style. These are correct for 911's up to mid-1972 as far as I can tell. After that, Porsche switched to what I call the "Bull-Nose" style S-Caliper.

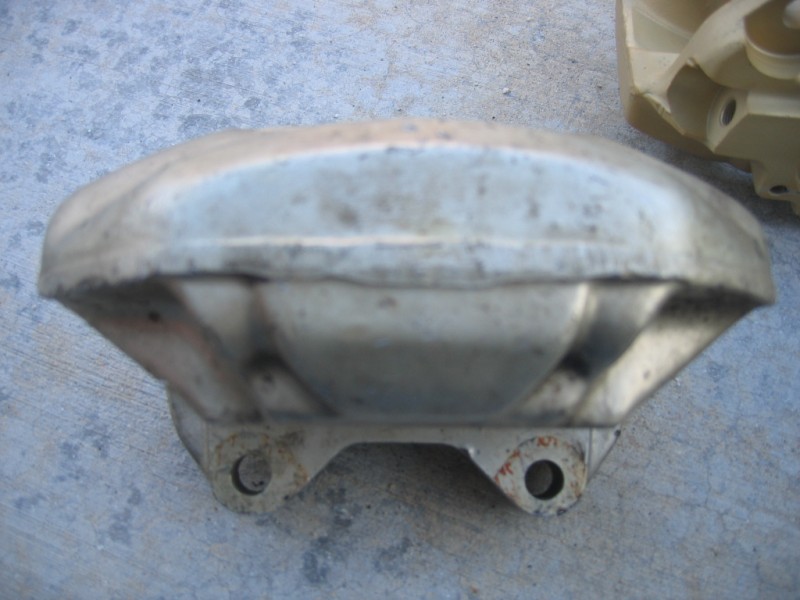
    What's the difference? Basically the nose and the finish treatment. What I call the "nose" is the part you can see extending into your open wheel. The early calipers have little wings in the casting as follows:


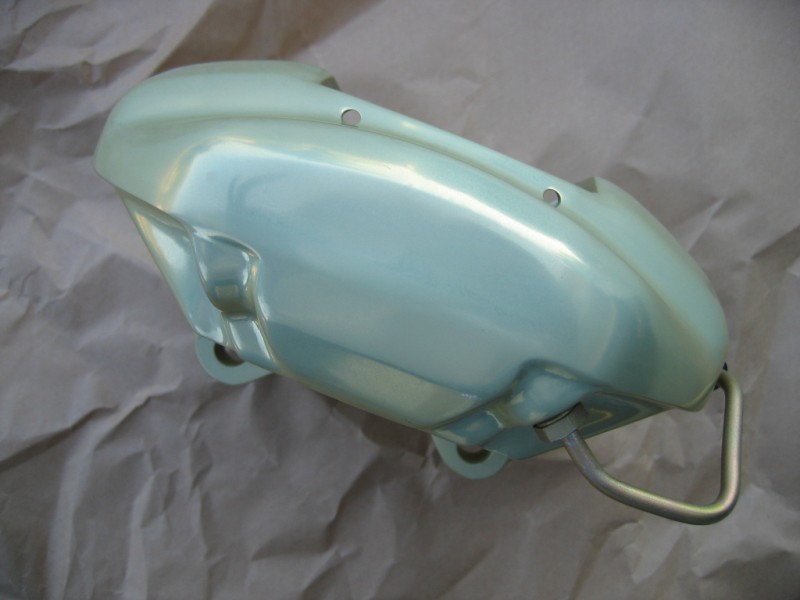
    These are also finished in clear anodizing while the later calipers are finished in a Dow Dichromate finish which gives them that classic greenish/goldish tint.

    The later S-Calipers have a rounded nose section as seen in this crappy picture (sorry):


    OK... here's a better picture of a late model dichromate S-Caliper:


    Now that we've gone through all the formal introductions let's get back to ripping apart Mark's calipers.

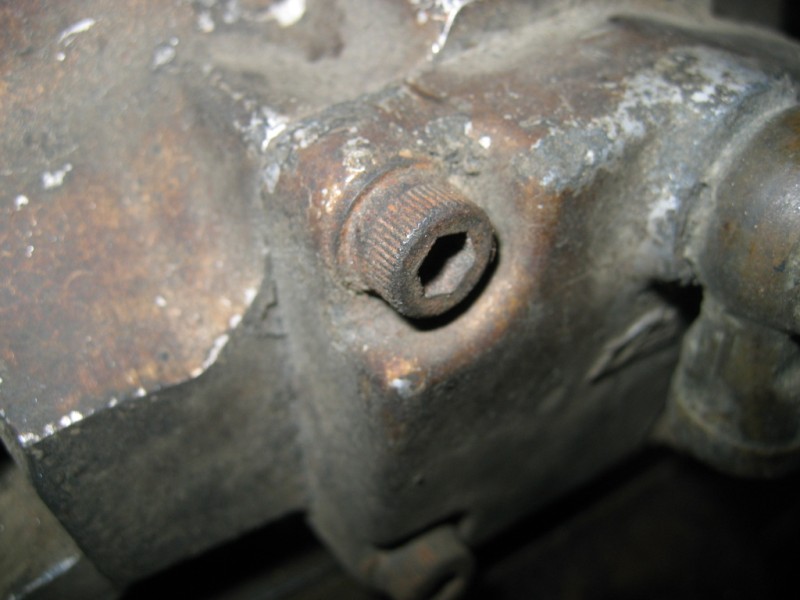
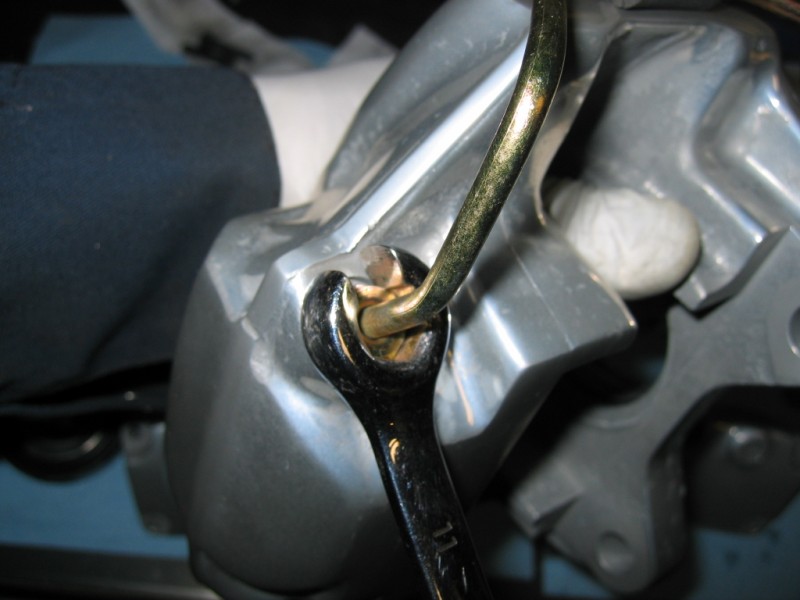
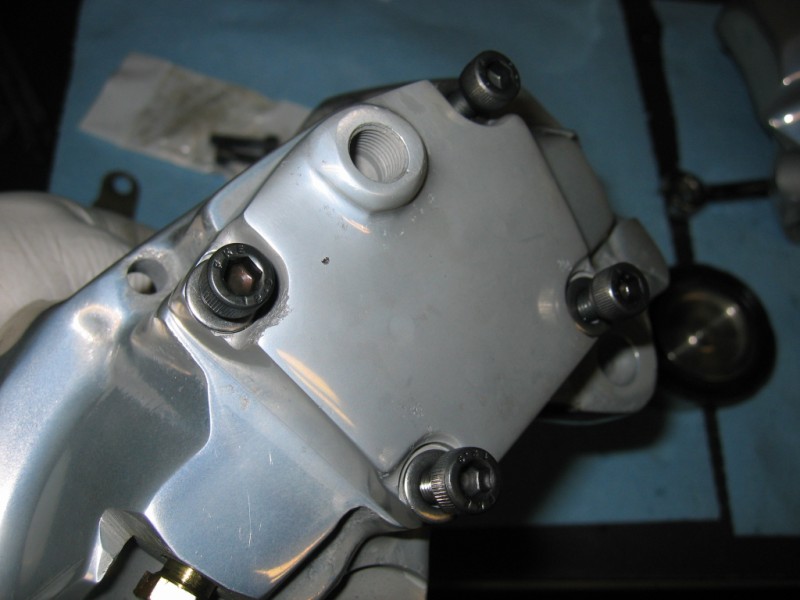
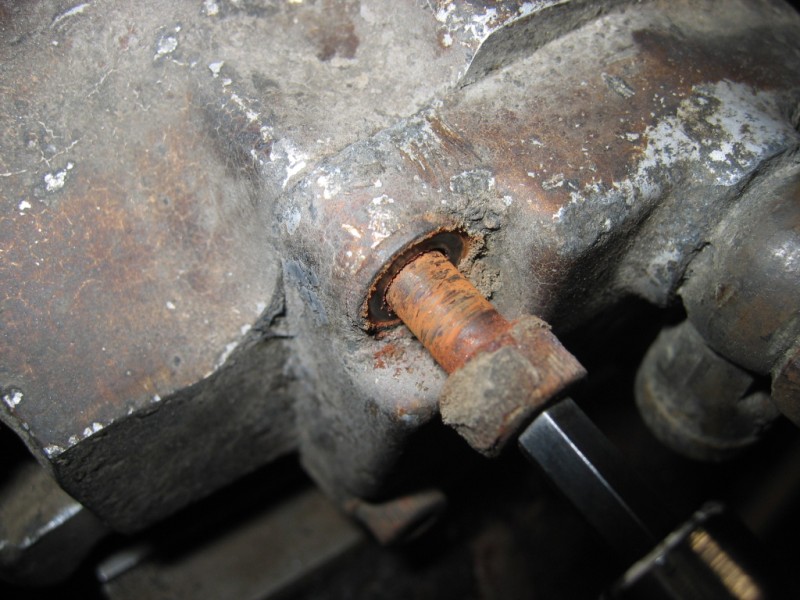
    The first order of the day is to get them apart. The pictures miss a step because it's best to take the banjo fitting off straight away. Next we dig into the fluid inlet covers. These are secured with (4) 5mm hex caps. Not a great bolt size when faced with years of dissimilar metal fusion:


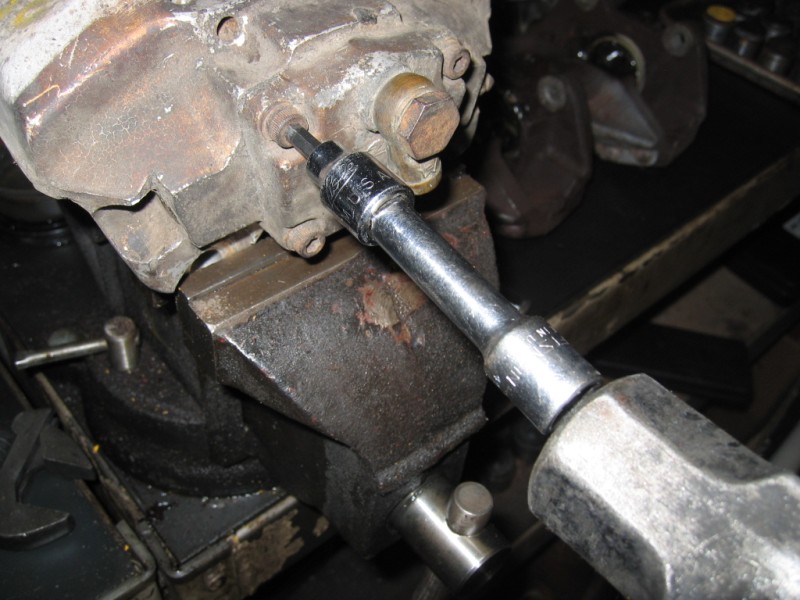
    This is why I recommend tapping the 5mm key into the head with a hammer to ensure a solid seat...:


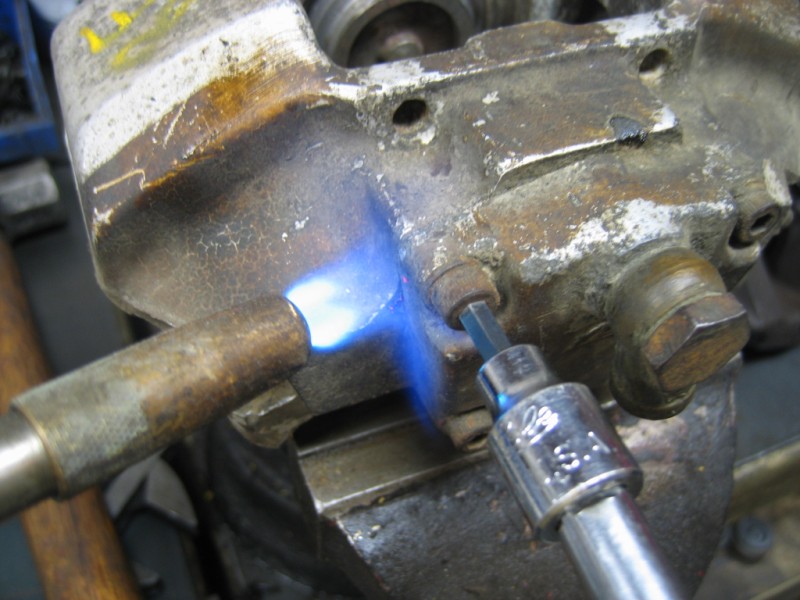
    ...and, our good friend Mr. MAPP torch:


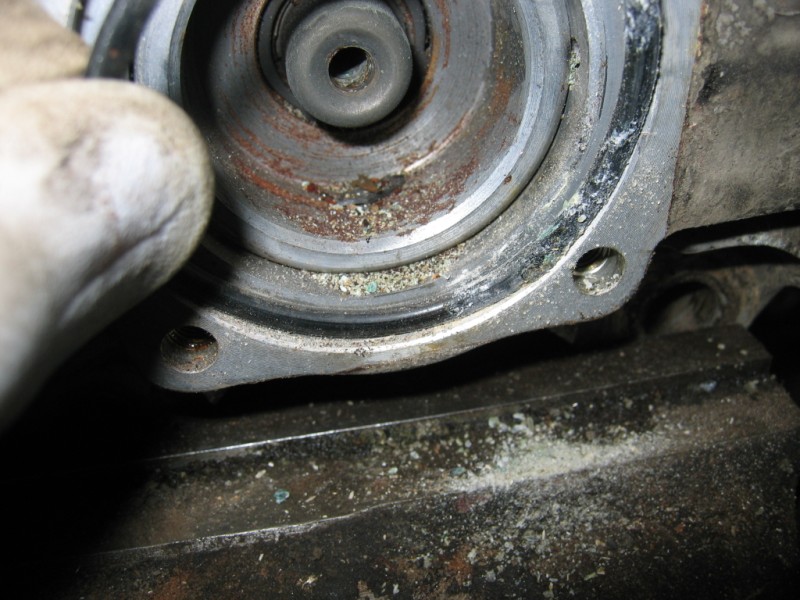
    It's best to heat the housing on the caliper where the bolt goes in. The heat will help snap the bond that has been built up between steel and aluminum over nearly 40 years. Even then, we had to perform major surgery on one of Mark's bolts. Massive amounts of heat and impact wrenches still couldn't budge one of the fasteners. This requires a delicate procedure of literally cutting the head off right at the washer, then pulling the inlet cover off and using Vise Grips (factory of course) to remove the remainder of the fastener from the caliper body and yes, we've gotten some in that have been snapped off in the aluminum... fun.

    And, out comes the fastener:
    Eric - Sandy, Utah
    71 911
    914-6/GT
    914-6/ORV
    87 944 Spec 1
    Porsche Truck
    62 Beetle
    80 VW “Caddy” Pickup
    72 R75/5 Toaster Tank
    PMB Performance
    We'll Make Your Calipers New Again
    Love Us On Facebook

  2. #2
    Senior Member Neunelfer's Avatar
    Join Date
    Dec 2002
    Location
    Sandy, Utah
    Posts
    1,511

    Out come the pistons...

    Once the fasteners are all out you can begin twisting the fluid inlet cover. Twist the cover 45 degrees and the corners will be exposed. Now tap the opposite corners with a plastic mallet slowly, back and forth until the cover comes off with the pin.

    Step back: If you feel your calipers are in good enough working condition (meaning the pistons are moving freely before tear down) you may want to simply blow out both pistons before you take the fluid inlet off. It may be easier that way. These pistons were stuck and grundgy (as you'll soon enough see).

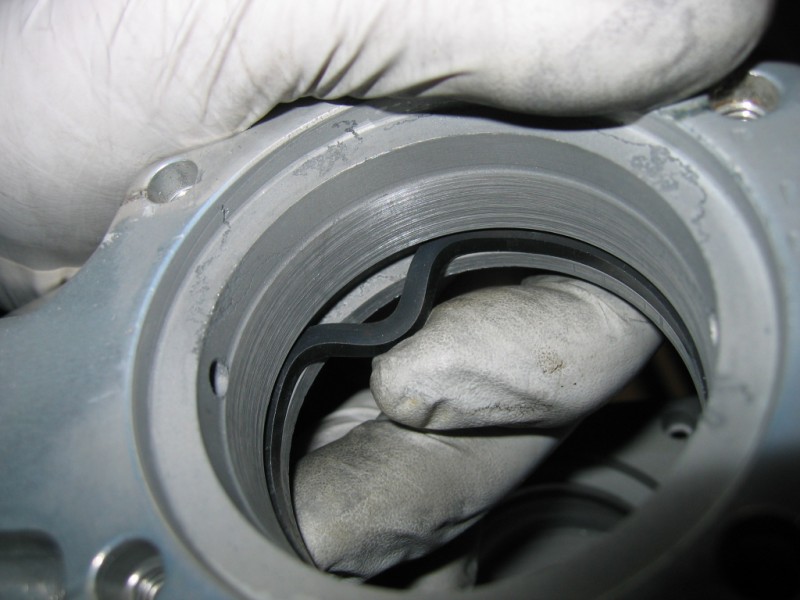
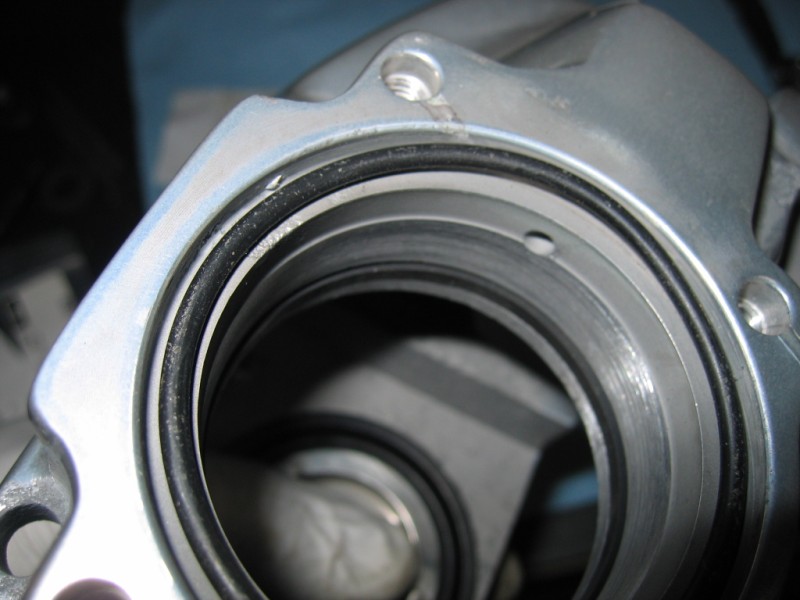
    Back to our regularly scheduled program. Once the cap is off, you'll be staring at the backside of a piston and what is called the "Knock-Back Mechanism". Did I mention grundgy?:


    The rubber o-ring you see in the above picture has never been offered in a rebuild kit. If you decide to tackle this job yourself, get in touch with me and I'll get you some of these. If yours are in decent condition you may want to clean them up and re-use them. I would recommend a light cleaning with PB Blaster right before you decide to put them back in. PB can swell the seal, which is why they coin it a seal reconditioner. I would not let a seal sit out for too long after it has been treated with PB Blaster. This is why I say a "light" cleaning as well. Those are gonners.

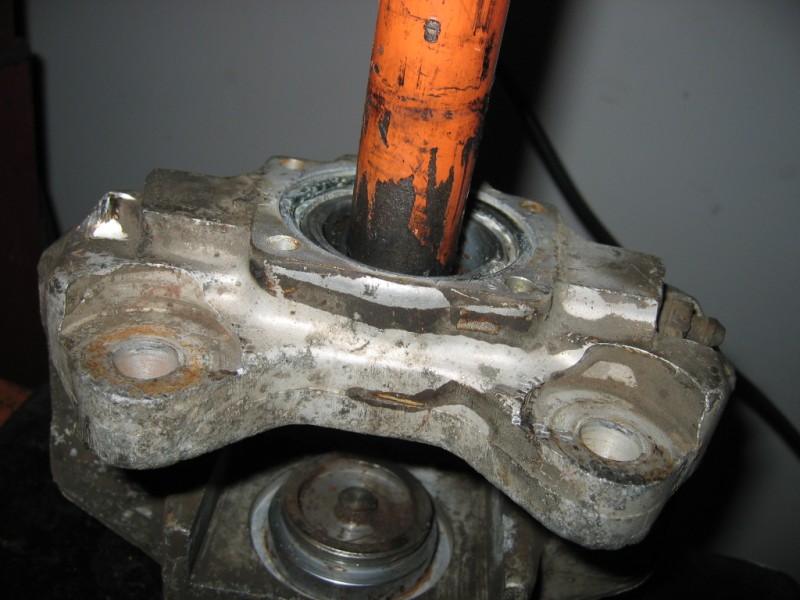
    With the seal out we take the caliper over to the press and gingerly push the piston out. It won't take much once it starts moving:


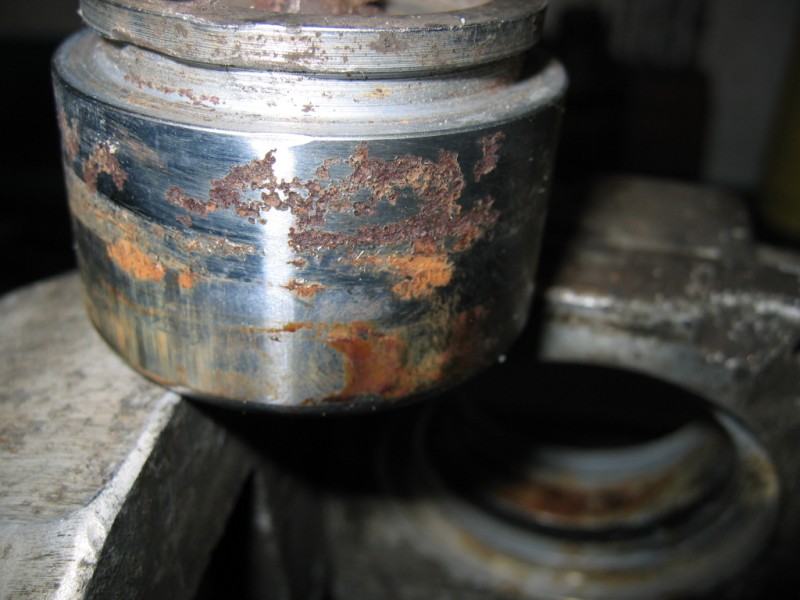
    Once it's out you will see why most every early S-Caliper needs to be rebuilt. I mentioned dissimilar metals working together to form a bond earlier when talking about the fluid inlet fasteners. ATE also saw this coming with the pistons so they plated them. With standard steel pistons we generally "never" see pitting problems however, with plated S-Caliper pistons this is the norm:


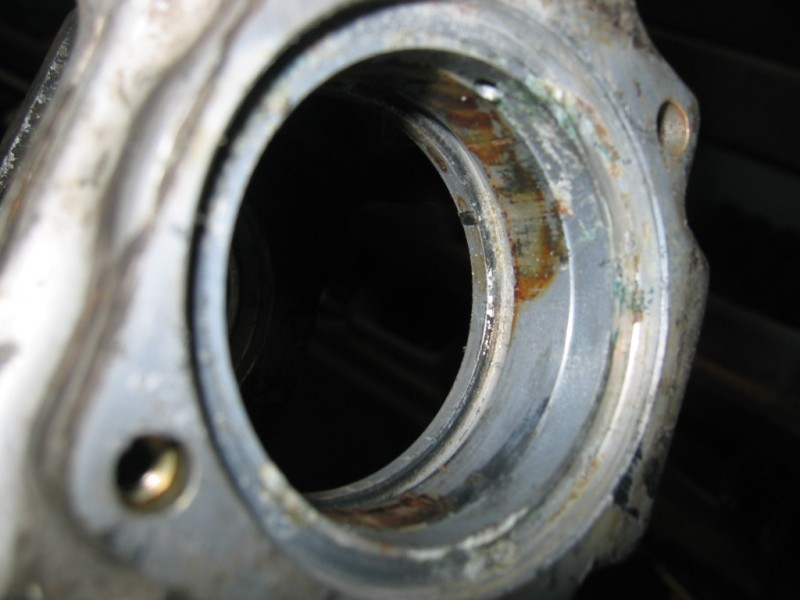
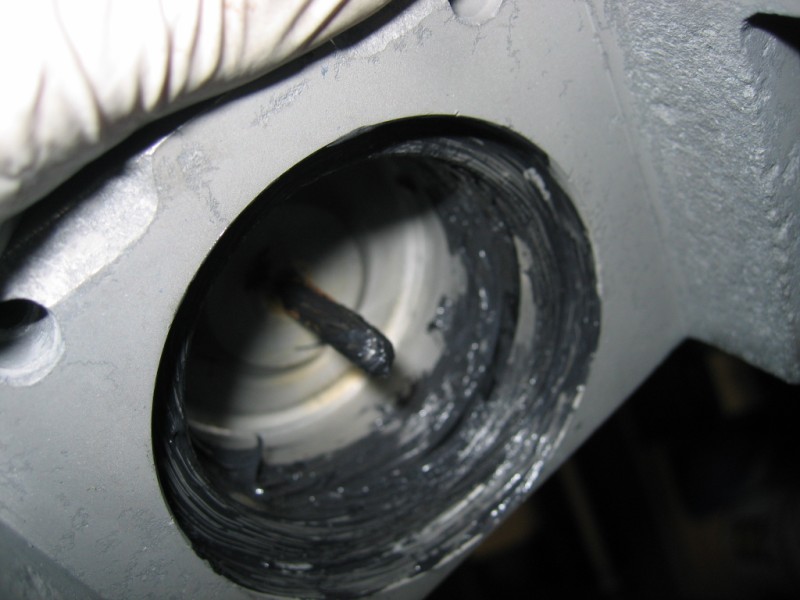
    Gents, I hate to break it to you but, nearly 99% of the S-Calipers we see are like this. This pitting is almost always confined to the area where the sealing ring is located in the caliper. Here you can see the bore where the piston sat and rusted:


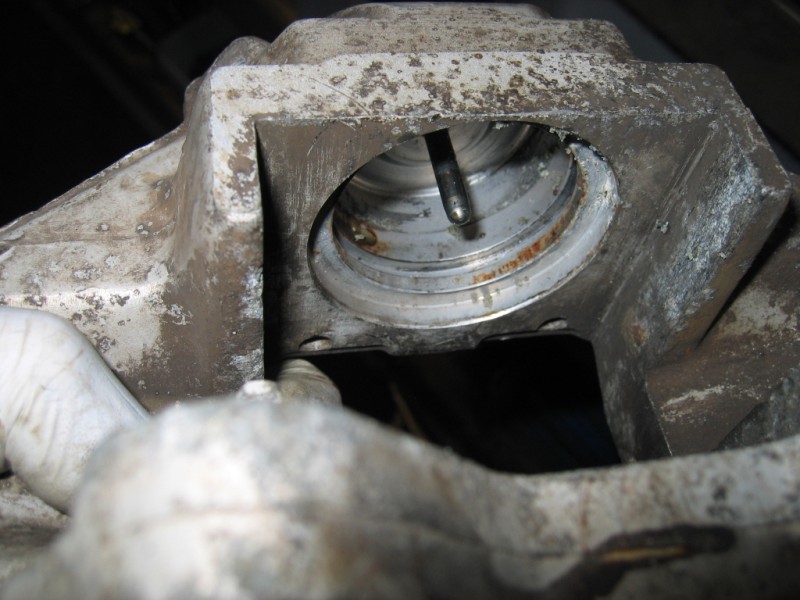
    With the piston out it's back to the bench to blow out the other piston. This can be accomplished with air or, if they're stuck and stubborn, grease can be used. These are closed circuit calipers with compensating lines running between the caliper 1/2's. Simply leave the bleeder in and remove the compensating line and insert the tip of your air nozzle in to remove the last piston. Position a piece of wood over the opening on the other side to protect it and the piston that will come flying out. With a careful eye and hand you can massage the velocity.

    Final piston is out:


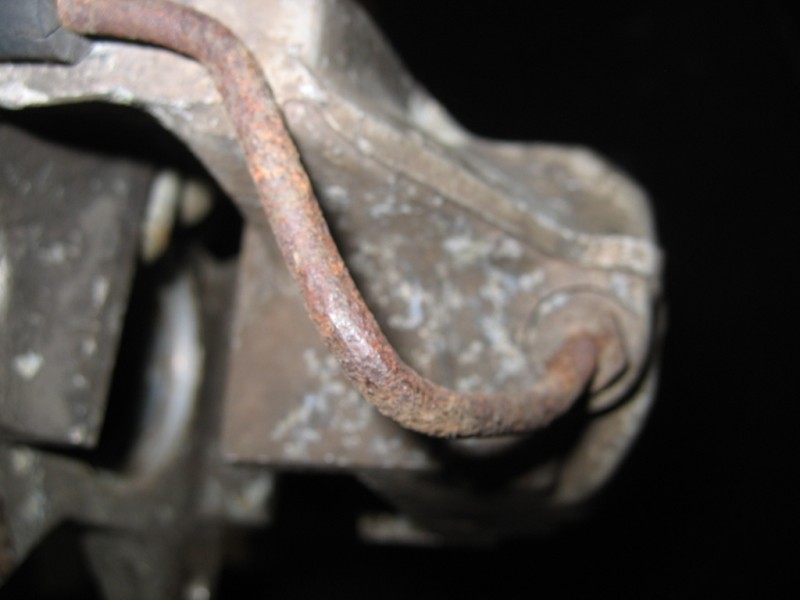
    Did I mention the compensating lines? Make sure you are very careful in their removal. They are extremely expensive (for what they are) and have to be ordered from Porsche... take a stab at what one of these would cost:


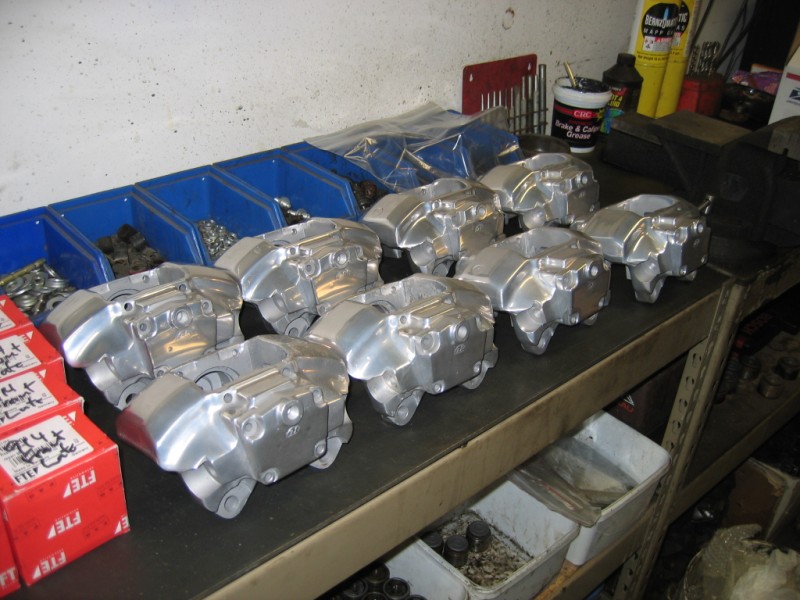
    That's it for today. Mark's calipers were boxed up in the morning and sent off to the anodizer's shop.

    Here's a little glimpse of what they'll probably look like when they return. Early S-Caliper Nirvana:

    Eric - Sandy, Utah
    71 911
    914-6/GT
    914-6/ORV
    87 944 Spec 1
    Porsche Truck
    62 Beetle
    80 VW “Caddy” Pickup
    72 R75/5 Toaster Tank
    PMB Performance
    We'll Make Your Calipers New Again
    Love Us On Facebook

  3. #3
    Senior Member Neunelfer's Avatar
    Join Date
    Dec 2002
    Location
    Sandy, Utah
    Posts
    1,511

    Today was piston day...

    This little episode will involve stainless pistons and what ATE call's "Knockback Mechanisms".

    When you purchase stainless pistons they come in their most basic form. If you care to retain your knockback mechanism you'll need to remove them from your pistons and install them in your new stainless set.

    About knockback mechanisms; Years back, I spoke with an engineer at ATE regarding those funny pins and gadgets in our calipers. He referred to them as "knockback mechanisms" and stated that they no longer use them. The basic design principle was to literally knock the piston back out toward the rotor to help acheive a high pedal feel. There you have it, it's that simple. If I find the PDF's he sent me I'll post them here.

    In speaking with a few crew members of some early racing teams I also learned that they commonly disabled these by simply breaking the pins off or removing the guts from the piston. They have been known to lock up a caliper in racing environments.

    My take? The choice is yours. We keep them in all restorations now unless we are asked to disable or remove them. My RS clone has them. My 914-6/GT car has the stainless pistons without the guts in place.

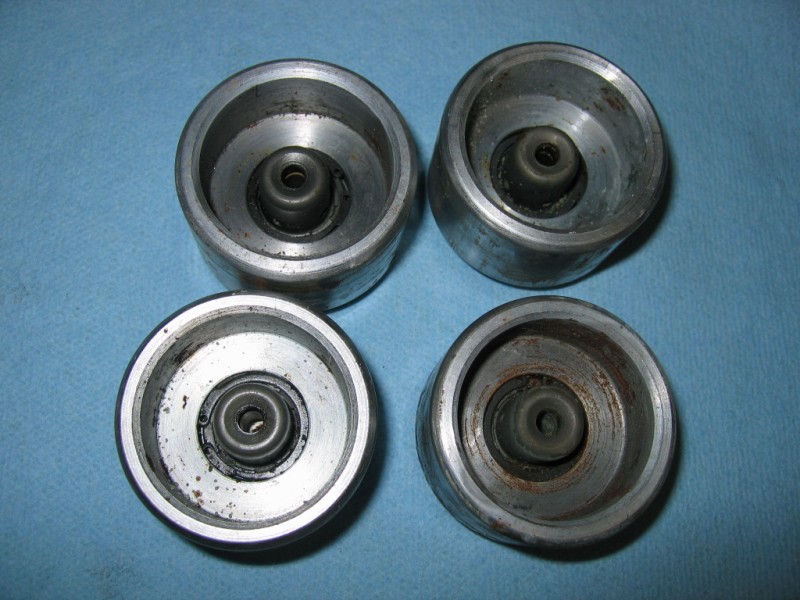
    Let's have a look at what we're talking about. You'll be able to see it clearly as we take the guts out of Mark's old pistons and install them in his new stainless pistons.

    Old pistons:


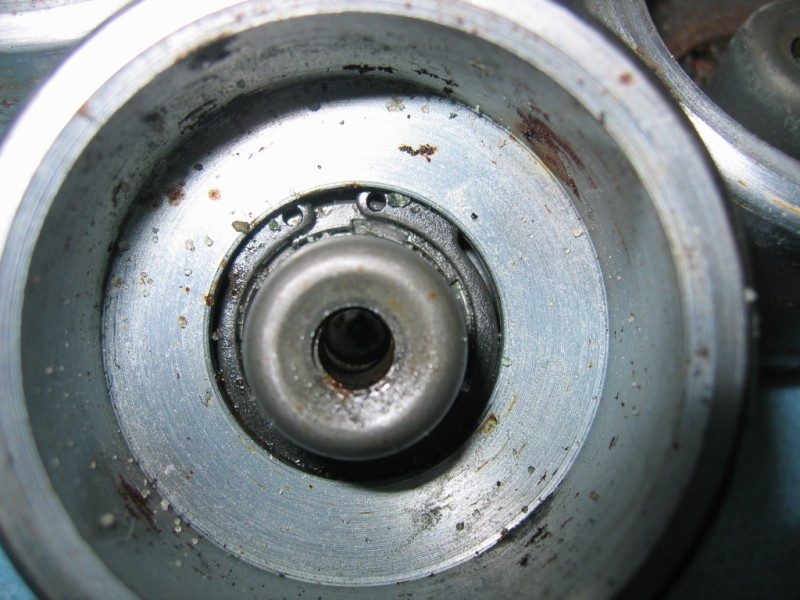
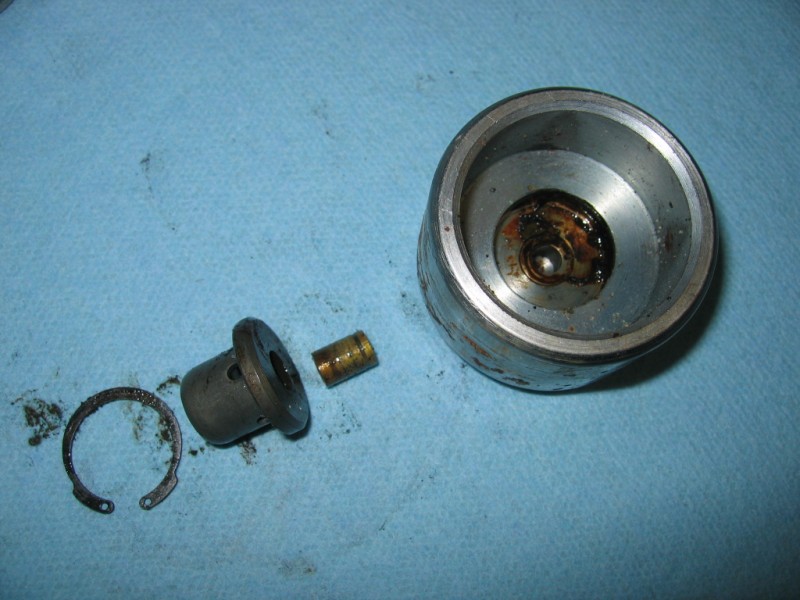
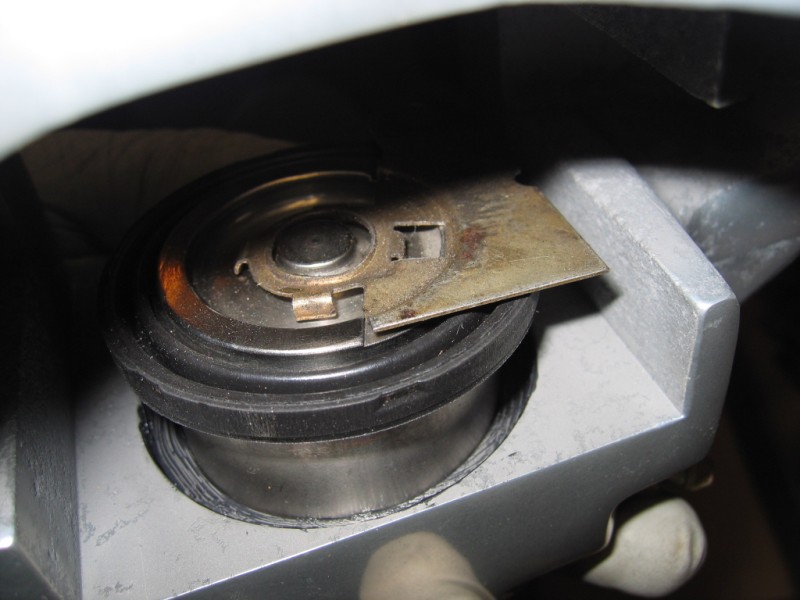
    Here's a close up of the mechanism that slides over the post in the calipers. To remove these, simply disengage the snap ring clip and lift the assembly out. I use a small screwdriver in the visable slot behind the clip head in this close up. Pull up one side, then the other. Hold your thumb over the end while you perform this procedure or this precious clip can go sailing across the shop... not fun:


    All the parts out and ready to be cleaned. There's a small brass pipe that will pop out of the bottom. The mechanism itself has a sping inside that, with the pipe, grab the post and help knock the piston back out toward the rotor:


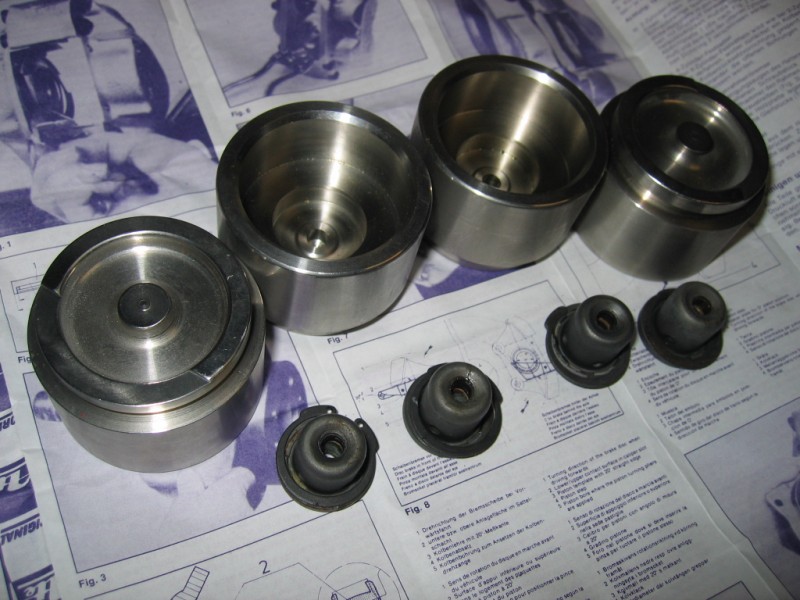
    Stainless pistons all shiney and new ready for the installation of the now cleaned parts:


    Need I say; "Installation is the reverse of these steps"?


    Done (like the fancy background?):


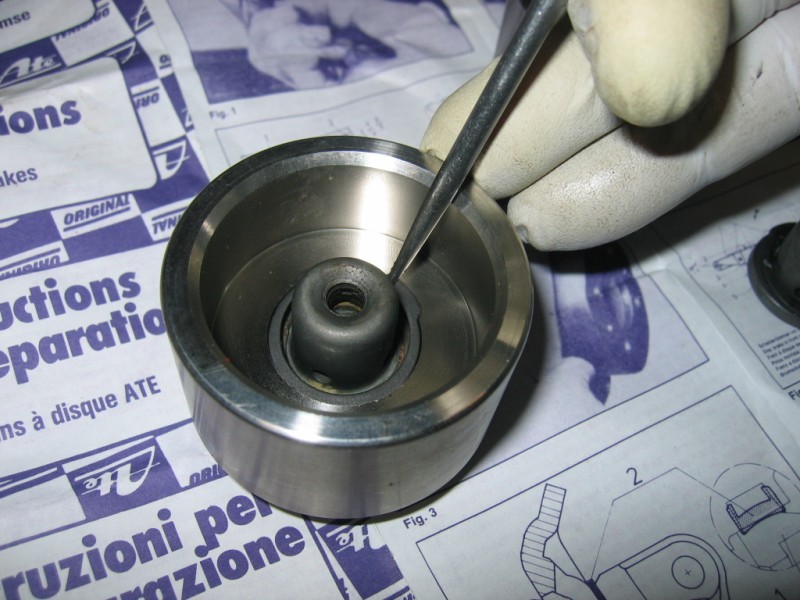
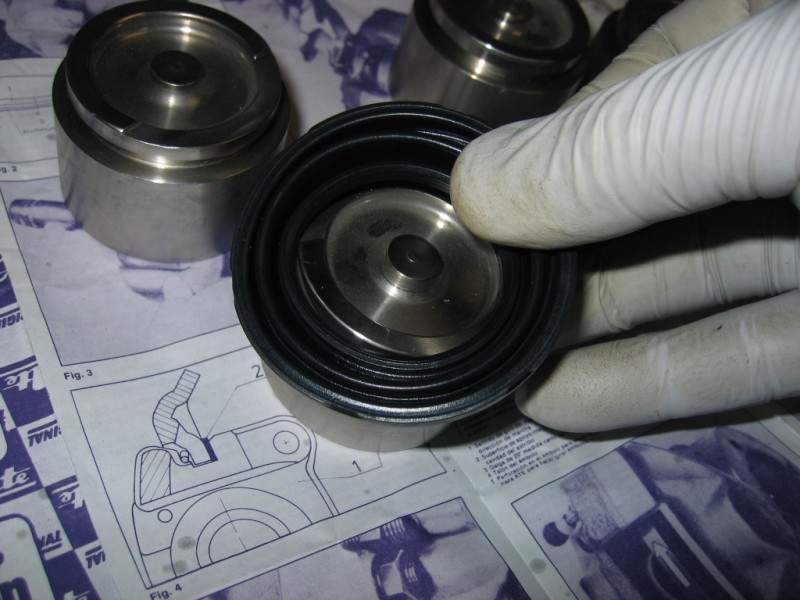
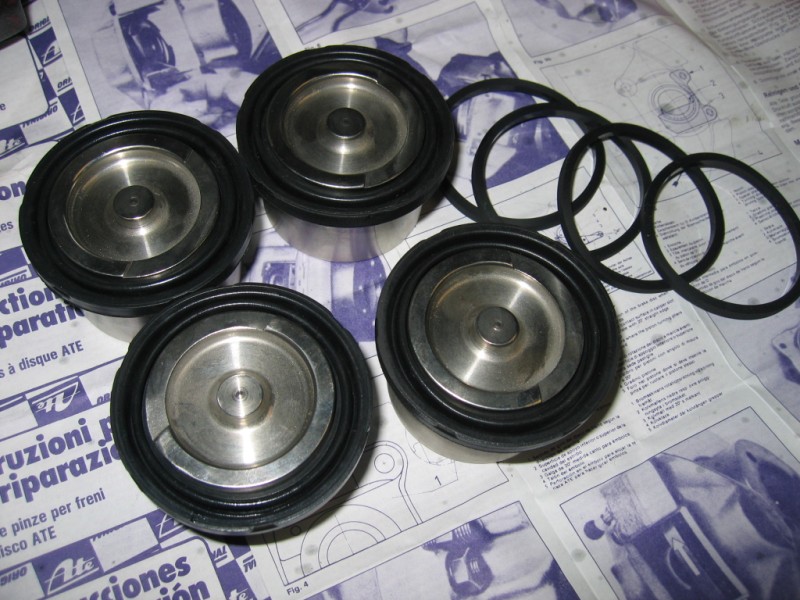
    Now it's time to install the dust cover over the piston. These are a tight fit. Work them into the groove then lift the dust cover upward while pulling the bead area out moving all the way around the piston to seat it properly:


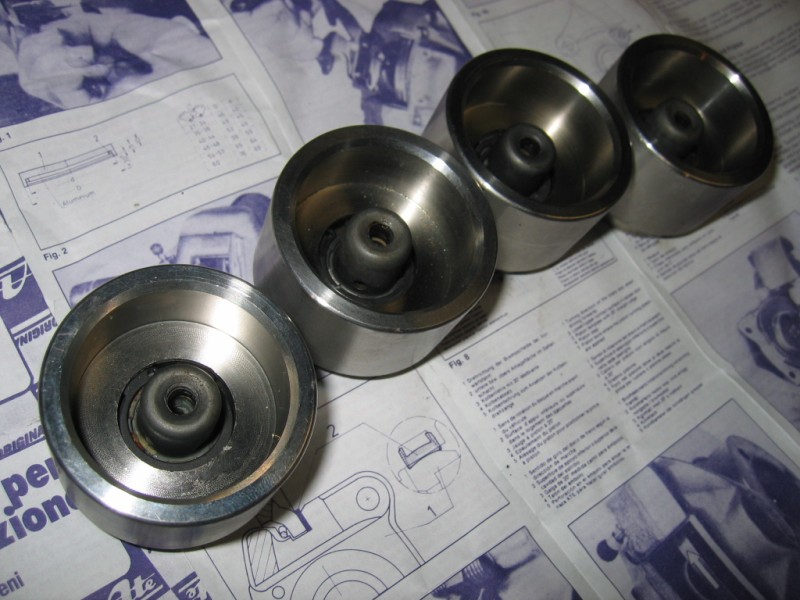
    Pistons waiting for calipers:

    Eric - Sandy, Utah
    71 911
    914-6/GT
    914-6/ORV
    87 944 Spec 1
    Porsche Truck
    62 Beetle
    80 VW “Caddy” Pickup
    72 R75/5 Toaster Tank
    PMB Performance
    We'll Make Your Calipers New Again
    Love Us On Facebook

  4. #4
    Hello,

    Thanks for posting this thread, it's great to see the transformation. I have also restored several sets of S callipers and wondered what you did with the steel pins in the callipers when they were anodised? Did you removed them or seal them over? Also did you just clean them before anodising did you have them polished at all? My last set I simply vapour blasted and then anodised but the finish was not as clean as the set in your pics.

    Thanks again

    Alan

  5. #5
    Senior Member CamBiscuit's Avatar
    Join Date
    May 2006
    Location
    Adelaide, Australia
    Posts
    1,447
    I have a feeling this information is going to come in very handy in the not too distant future

    Thanks for posting!
    Looking for engine # 6208151
    '74 RS 3.0 Replica
    '70 911E Bahia Red (SOLD)
    '71 911 S/T Replica 2.3 Twin plug BEAST (SOLD)
    Australian TYP 901 Register #78
    Early S Registry # 1076

  6. #6
    Senior Member Neunelfer's Avatar
    Join Date
    Dec 2002
    Location
    Sandy, Utah
    Posts
    1,511
    Thanks Cam, I hope it helps.

    Alan, the knockback posts need to be either:

    1. Masked with a masking agent; if you plan on keeping them or,
    2. Removed completely. This means milling out all remaining steel after simply breaking them off.

    As you know (but others may not), steel and anodizing do not mix.

    Regarding the finish (this goes for Fuchs wheels as well); These have to be de-anodized first. The anodizing layer protects the material from the elements, it also prevents it from being polished. Your results with blasting and then anodizing may have left some anodizing on the surface but moreover, anodizing dulls the finish slightly. The slightly dull anodizing effect is the patina we all recognize and love as the factory fresh Fuchs. It is an "excellent" way to protect these calipers from the elements.

    The calipers, once de-anodized, (and any Fuchs that are being refinished) should be polished to a fairly high shine then re-anodized as the final step. So:

    De-Anodize
    Polish
    Re-Anodize
    Eric - Sandy, Utah
    71 911
    914-6/GT
    914-6/ORV
    87 944 Spec 1
    Porsche Truck
    62 Beetle
    80 VW “Caddy” Pickup
    72 R75/5 Toaster Tank
    PMB Performance
    We'll Make Your Calipers New Again
    Love Us On Facebook

  7. #7
    Relaxed Rich Lambert's Avatar
    Join Date
    Jun 2007
    Location
    Lake Stevens, WA
    Posts
    600
    Another great caliper rebuild thread!

    So, how much are the compensating lines and, couldn't you just bend a set of those up yourself?
    Rich
    1966 911 #303872
    ES#1197
    RG#478

  8. #8
    Senior Member Neunelfer's Avatar
    Join Date
    Dec 2002
    Location
    Sandy, Utah
    Posts
    1,511
    Come on Rich, you take all the fun out of it, you're supposed to guess. I suppose you peak at your presents as well...

    Alright, alright... around $69 for one and $74 for the other (they are quite different ya know ). They are a pain to bend but, I imagine it can be done. I tried to get a local brake specialty shop to do one years ago and they declined sighting legal issues. I have turned left ones into right ones before.
    Eric - Sandy, Utah
    71 911
    914-6/GT
    914-6/ORV
    87 944 Spec 1
    Porsche Truck
    62 Beetle
    80 VW “Caddy” Pickup
    72 R75/5 Toaster Tank
    PMB Performance
    We'll Make Your Calipers New Again
    Love Us On Facebook

  9. #9
    Senior Member Neunelfer's Avatar
    Join Date
    Dec 2002
    Location
    Sandy, Utah
    Posts
    1,511

    Back at it...

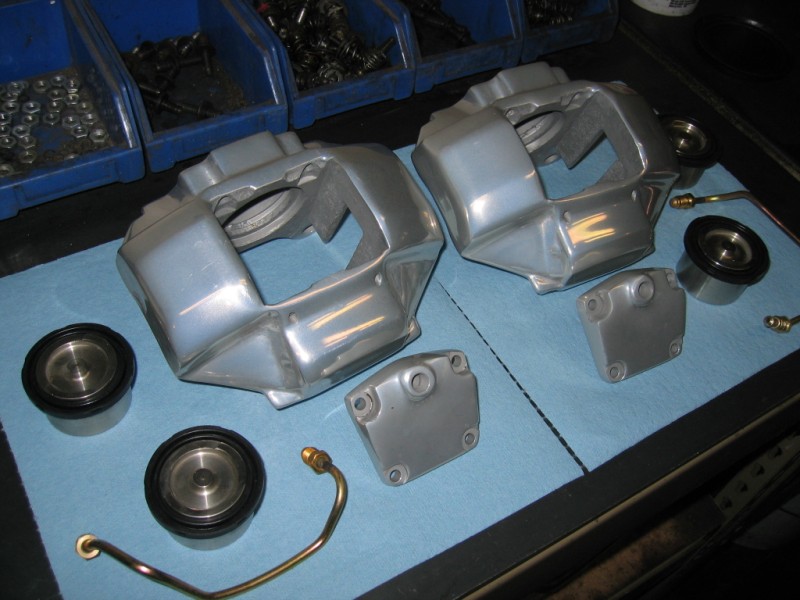
    Mark's calipers came back from the anodizing shop today and we got started on the process of putting them back together.

    We've taken a big step here by having these calipers re-anodized. As you can see in the previous pictures, these beauties had seen better days. The process will not remove all the pitting (most is inside where the pads reside) however, these are now protected for another 40 years of use. Anodizing is gud.

    Here they are:


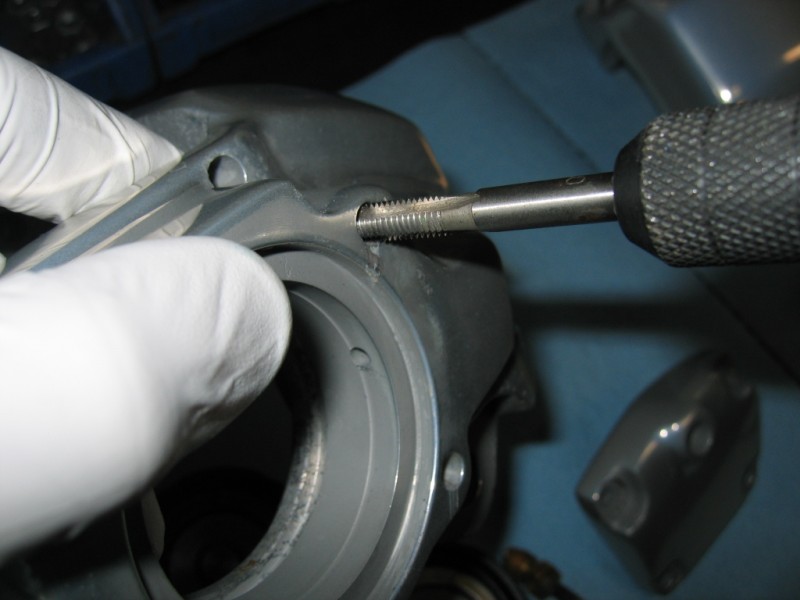
    We begin the assembly with a little prep work. A 6x1 tap will clean out the fluid inlet cover holes and make sure the new fasteners go in perfectly. There's a lot of polishing grit and residue that makes it's way in there:


    We lightly hone the bores and add the piston seals:


    After that, I like to install the compensating lines, in doing so we've set the calipers up for left and right orientation. These calipers can be set up for either left or right depending upon which line goes where:


    With the lines in place we know which way to orient the pistons. First we use brake grease and apply not only in the bore but also where the dust cap will seat. The dust cap has the retainer formed into the rubber and the grease allows this to slip into the groove:


    Once the bore is greased it's time to set the pistons. I use an old pad positioner to determine the proper 20 degree angle:


    This pistons is then pressed in place with a hefty piece of flat stock over the top to ensure the dust cover ring is seated properly (sorry, picture didn't turn out).

    Once that side is in we concentrate on prepping the remaining bore. First we install a new rubber seal:


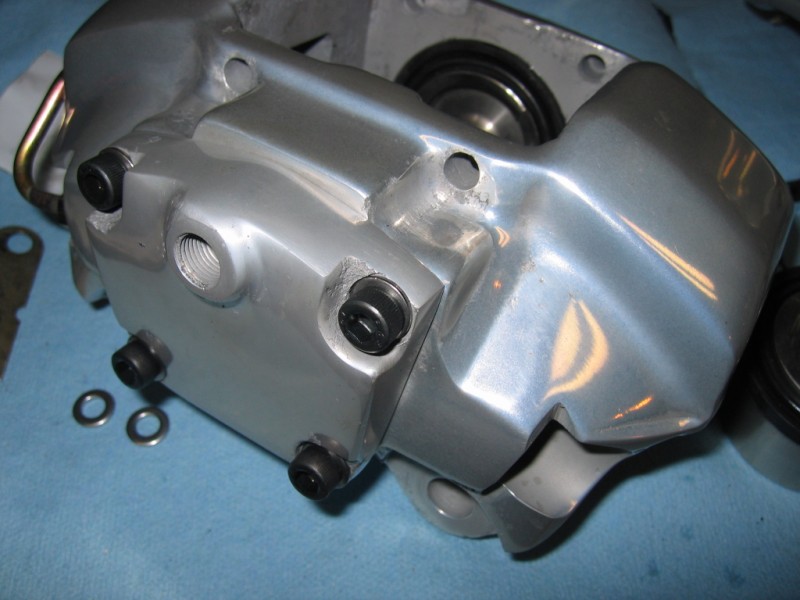
    Next we install the cover with new washers and fasteners:


    Torqued down to 15lbs. in a cross bolt pattern:


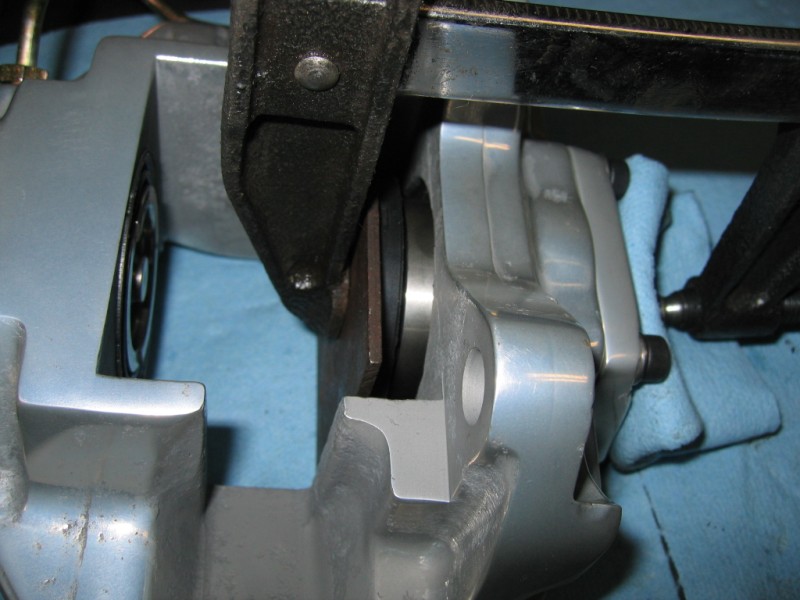
    The final piston is pulled into place using a hand clamp, flat stock and some padding for the backside:
    Eric - Sandy, Utah
    71 911
    914-6/GT
    914-6/ORV
    87 944 Spec 1
    Porsche Truck
    62 Beetle
    80 VW “Caddy” Pickup
    72 R75/5 Toaster Tank
    PMB Performance
    We'll Make Your Calipers New Again
    Love Us On Facebook

  10. #10
    Senior Member Neunelfer's Avatar
    Join Date
    Dec 2002
    Location
    Sandy, Utah
    Posts
    1,511

    Done!

    Remember what they looked like?


    And the finished product:
    Eric - Sandy, Utah
    71 911
    914-6/GT
    914-6/ORV
    87 944 Spec 1
    Porsche Truck
    62 Beetle
    80 VW “Caddy” Pickup
    72 R75/5 Toaster Tank
    PMB Performance
    We'll Make Your Calipers New Again
    Love Us On Facebook

Similar Threads

  1. Step-by-step valve adjustment instructions
    By 72targa in forum Technical Info
    Replies: 12
    Last Post: 06-17-2010, 04:29 PM
  2. Will 912's always be red-headed step child?
    By Frank Beck in forum General Info
    Replies: 34
    Last Post: 06-26-2009, 04:03 PM
  3. Replies: 3
    Last Post: 07-21-2006, 06:50 AM
  4. Another step forward for 73VGE
    By larry47us in forum General Info
    Replies: 7
    Last Post: 03-26-2004, 01:58 PM

Posting Permissions

  • You may not post new threads
  • You may not post replies
  • You may not post attachments
  • You may not edit your posts
  •  

Message Board Disclaimer and Terms of Use
This is a public forum. Messages posted here can be viewed by the public. The Early 911S Registry is not responsible for messages posted in its online forums, and any message will express the views of the author and not the Early 911S Registry. Use of online forums shall constitute the agreement of the user not to post anything of religious or political content, false and defamatory, inaccurate, abusive, vulgar, hateful, harassing, obscene, profane, sexually oriented, threatening, invasive of a person's privacy, or otherwise to violate the law and the further agreement of the user to be solely responsible for and hold the Early 911S Registry harmless in the event of any claim based on their message. Any viewer who finds a message objectionable should contact us immediately by email. The Early 911S Registry has the ability to remove objectionable messages and we will make every effort to do so, within a reasonable time frame, if we determine that removal is necessary.