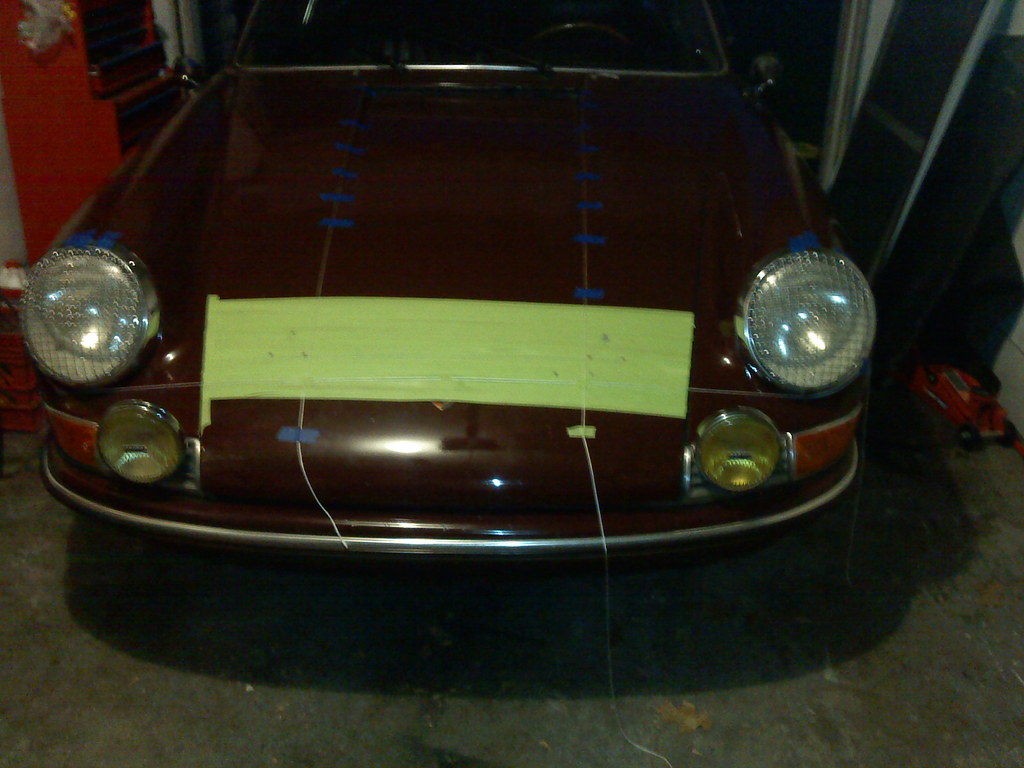
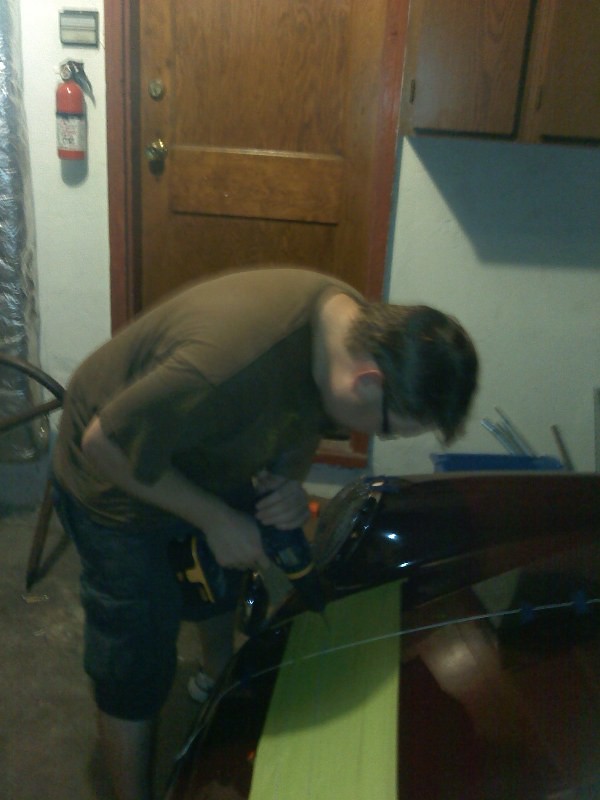
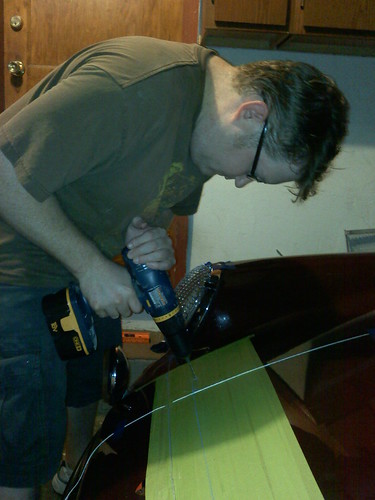
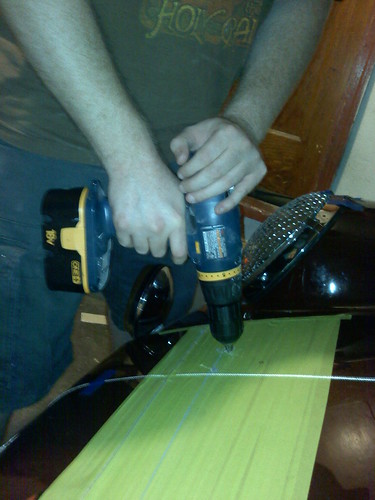
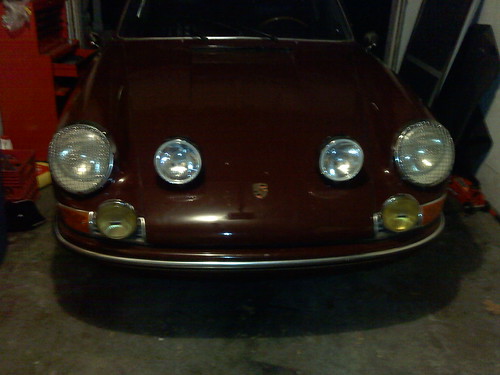
and after measuring many many times.. we drill.
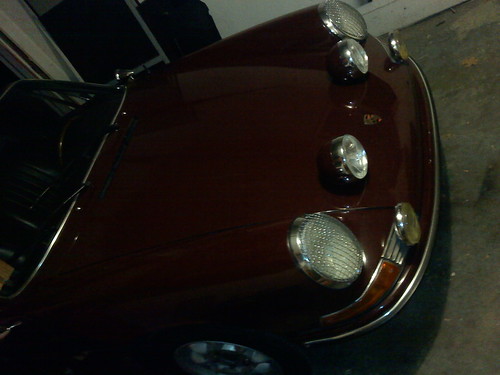
what do you guys think? i havent started wiring and they are only somewhat mounted at this point to see how it looks..


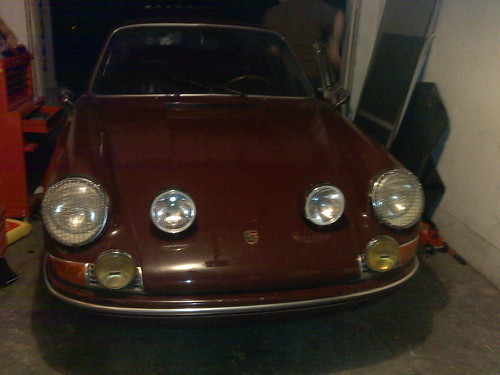
and after measuring many many times.. we drill.
what do you guys think? i havent started wiring and they are only somewhat mounted at this point to see how it looks..
Harry Hoffman
1968 912 #3656, burgundy red 'Fritz'. Some mods..
912 Registry charter member #912R0195-C
Early 911S Registry Member #2070
356 Registry Member #36691
http://hoffman912.blogspot.com/
Nah. Go back to the way it was.
Nice Harry, does this mean RITV has some nighttime components?
-Mike
Looks great Harry.
Mark Erbesfield
2018 911 Carrera T 7spd manual 😊
1973 911S #9113301282
1957 356A #58648
1966 Toyota Land Cruiser FJ45LV
1982 Toyota Land Cruiser FJ40
1977 Toyota Land Cruiser FJ40
1972 Toyota Land Cruiser FJ40 FST (Factory Soft Top)
1971 Toyota Land Cruiser FJ40 Patina Queen
1979 MB 450SL "Dad's old car"
2019 Cayenne "Wife's car"
Thanks guys! Honestly, the drilling was the easiest part. it took maybe 5 minutes to drill those holes. It took several hours of measuring and checking and lining up, and relining up to do it.
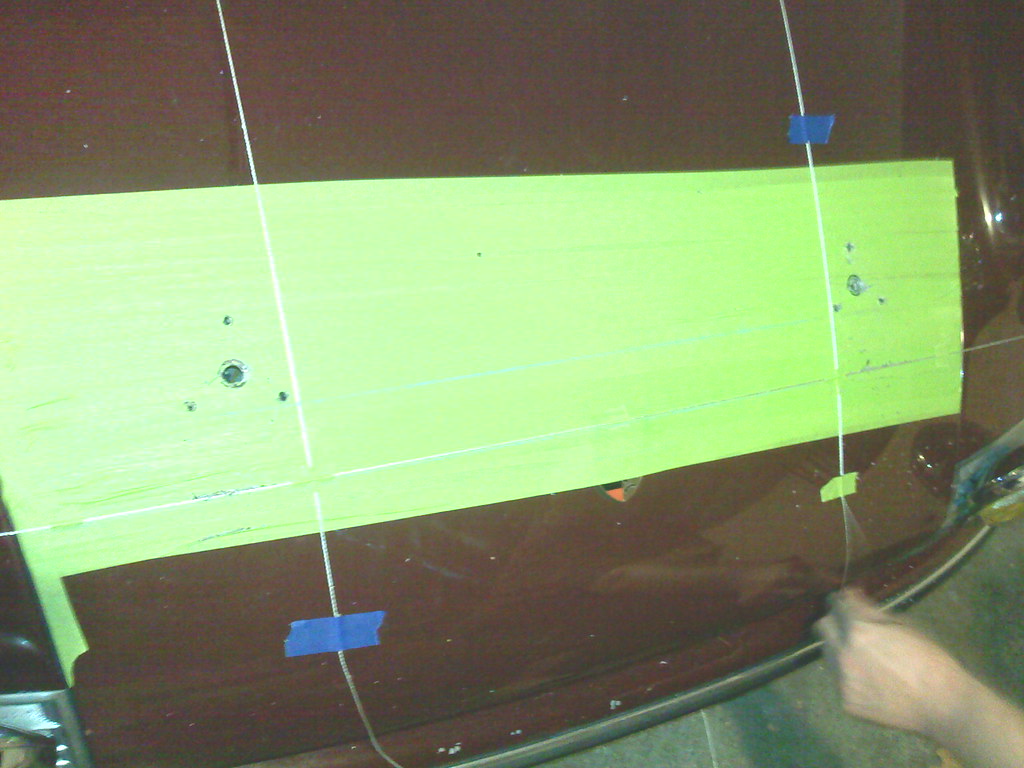
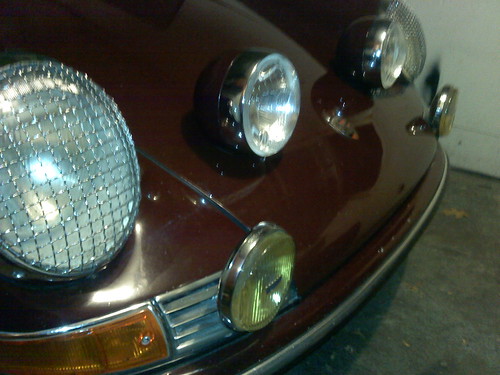
first i put the tape down -3m green automotive paint tape. i made sure to put a few layers of paint down covering a broad range of the area where the hood lights would go. this does several things a) protects the paint from scratches when mocking it up b) gives you a place to draw and make marks c) helps prevent the paint from cracking when you drill and d) if you're using blue chalk line, it will stick out, as opposed to if you use blue painters tape.
next i took string and lined up the ridges for the air vent on the hood. these lines are meant to help grid and give you a reference point.
i made sure to measure the distance from the edge of the hood to the string towards the bottom, where there was no longer a ridge, as well as the distance from the hood badge to the string to make sure it was straight.
next i took string and ran it from the top of the headlight to the top of the other headlight (resting between the paint and the chrome ring), to have a reference point.
next i took another string and ran it from the bottom of the headlight to the bottom of the other headlight, just below the mounting screws. i measured this from the bottom corner of the hood to the string on both sides to ensure it was straight and level. i also eye balled it as it went across the hood crest to make sure the line wasnt crooked.
all of these strings were taped down in several areas to ensure it was tight, straight and wasnt going to move.
next i mocked it up to see where i wanted it.. starting where the strings crossed. i didnt like the look of that, and having the lights slightly off center from the lines running down the hood was more pleasing to the eye for me and more interesting (kind of like when you learn the law of 3rds in photography class), so its just off center.
the bottom of the light trim ring has a tab.. that tab was placed about 1.5 inches from where the lines intersected, but on the line that ran across the hood, from the headlights.
next we marked it, and then took the lense from the assembly, placed the ring back on an were now able to reach into it and mark the drilling points through the holes in the assembly.
this gave us the ball park idea of where we wanted it.
we found that the big circles in the center were the same distance from the string running across the front. we then took chalk line and chalked a line running across those points to give us a more precise and straight value to go from.
from there we figured out which mock up we liked best, and measured the distances from those circles to the chalk line and to the string. we transferred those measurements to the other one.
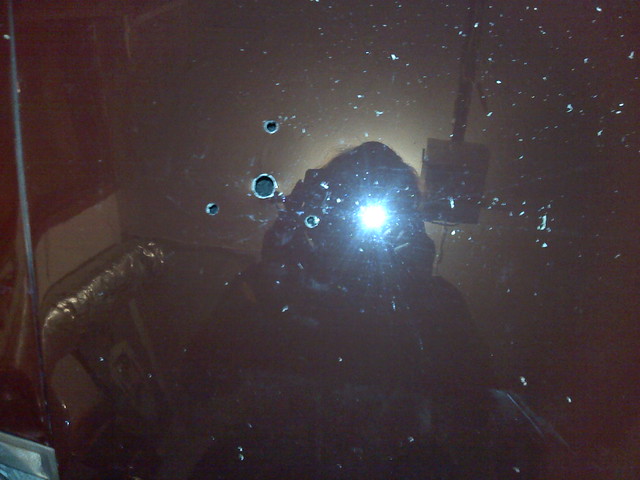
next we found the center of each circle.. then came the ballsy part. use a center punch to mark the spot where to drill. this is where you know youre going to either have little dents on your hood.. whether you drill or not, this is the point of no return!
punching it prevents the bits from walking and also lets you know where to drill.
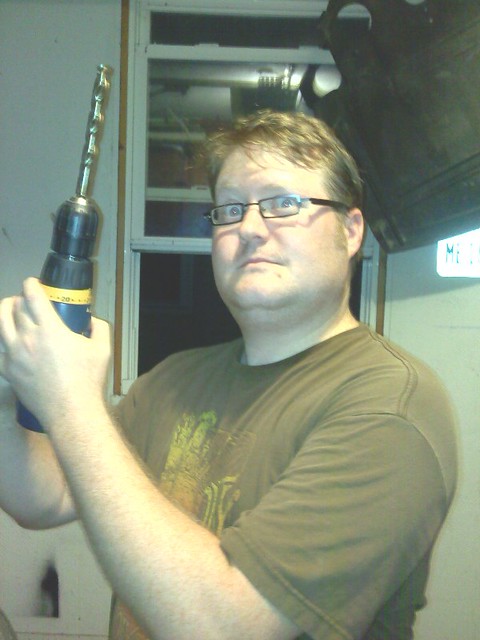
next i started with a smaller bit. and did all holes.. then i did a 1/4 bit and made them bigger.
next i went one more step up on the centers and used a 3/8, and then one final step to a 1/2.
next i used a rounded file to clean the holes.
There is not a standard factory measurement that i could really find. there isnt a template. you have to figure out what looks best to you, and then measure that and duplicate it on both sides. there is one shot showing measurements, but that looks awfully low in relation to the hood badge, and where others that looked more pleasing sat in relation to the hood badge.
you dont want it higher than the headlights and you dont want it lower than the headlights. you dont want them too far in or too far apart. do your homework, look at LOTS of pictures to see how everyone else has done it and go from there. when you measure, measure it as many times as it takes for you to be 110% certain that is where you want it. measure it from as many reference points as you can.. the bottom edge of the hood, the side of the hood, the stings, the chalk lines, the hood badge.. use ribbon measuring tape (like a taylor uses). dont only measure the holes.. measure your reference points too (strings etc) to make sure they are square and correct in relation to the sides of the hood and badge.
i always looked at the distance in other pics in relation to the hood badge, hood ridges and the headlights.. especially the hood badge.. those are the only constant point that will be the same in every car.
Harry Hoffman
1968 912 #3656, burgundy red 'Fritz'. Some mods..
912 Registry charter member #912R0195-C
Early 911S Registry Member #2070
356 Registry Member #36691
http://hoffman912.blogspot.com/
Harry, job well done and many thanks for taking the time to post your most excellent tutorial on this project.
thanks! sorry the pics are sh*t. my nikon dslr's battery died and my g/f resorted to using her camera phone since he point and shoot was also dead.
let me know if you have any questions. the big thing is to measure every line, every point, every reference to make sure it is square and standard as possible on both sides. measure them against constants, and measure many times..
then only mark and drill when you know everything is right... (and measure your marks many times before you drill!)
Harry Hoffman
1968 912 #3656, burgundy red 'Fritz'. Some mods..
912 Registry charter member #912R0195-C
Early 911S Registry Member #2070
356 Registry Member #36691
http://hoffman912.blogspot.com/
 Posting Permissions


 Reply With Quote