Hey, Uli . . .Originally Posted by uai

My, my, my . . . what sharp eyes you have, My Friend
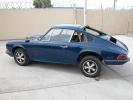
And yes --- that's exactly what it is. Fascinating vehicle, too. A Special Project that John's been working on . . . needs/deserves its own thread


Hey, Uli . . .
My, my, my . . . what sharp eyes you have, My Friend
And yes --- that's exactly what it is. Fascinating vehicle, too. A Special Project that John's been working on . . . needs/deserves its own thread
Great pics, Rick
scott kinder
kindersport@gmail.com
Registry #614
9110220587 - 1973 RSR revival in progress
My Car Thread: "Five-Eighty-Seven..."
If it isn't there, it didn't cost anything, it doesn't weigh anything and can't break." - From the philosophy of Grady Clay
After collecting seat bits for the last couple months, I found some time to install all this stuff into 1059. Finally
I’m calling this seat an ‘Early Scheel’ because it has no/zip/zero provision for a headrest, and also, because there were/are no part numbers/model numbers/tags/badges/etc of any kind on it. Or metal, for that matter . . . although there is some wood (!) Seat’s really only recognizable as a Scheel by its distinctive shape/particular materials/workmanship. And --- ‘cause Gerrit at NML Depot says so
Anyway, I’ve read a lot about vintage seats on our site . . . . but still wasn’t exactly sure how all this stuff fits/works/goes together. Stock bits found already in the car are one thing --- but switching a seat out/replacing it with something completely different? . . . different deal
Basically, I figured that there are three bits that I needed to switch out a seat
One . . . The (replacement) Seat, previously described --- which sits on top of . . .
Two . . . . The Sliders. The ones that I’m using are what I’ve seen/read described as Scheel Light-weight Sliders. Odd bits. I was lucky as these were already attached to the seat --- so I knew they would fit . . . . which isn’t always the case. Sliders, in turn, attach to . . .
Three . . . The Bracket --- also called a ‘console’ if you’re speaking European --- which is the bit that actually attaches to the vehicle floor. Just got this, also odd --- possibly Scheel? --- looking old, roughly turned-out . . . . and which fits in perfect with the rest of 1059. (No shiny/new on top of/next to crusty/used)
And all these replacement-seat-bits feel old, and kinda crude --- more ‘60s than ‘70s --- and so, could seem more appropriate/correct installed in some SWB/TR-type car? But then again, if it was 1970, and I was some Sporty Car Guy --- on a budget . . . I can see myself poaching some old ratty race car cast-offs to stick on my car, so . . . . these bits fit in with how I do things, anyway
I don’t restore --- anything. More like . . . re-cycle
Anyway, aside from this being one of my ‘upgrades,’ I changed out 1059’s original for three reasons
First? Condition. The original/existing driver’s seat upholstery is just about done. The coverings were already old when I got the car --- and in pretty decent shape, still . . . but things have gone down-hill since, especially with more driving. The driver’s seat covering had started to part company with its backing, last year already --- so I could either service/restore what’s there . . . or replace it. Restoring a beat old seat isn’t cheap . . . . and I’d really hate to replace Original Stuff in general . . . just because. Not my first choice, and besides --- there are other issues, like . . .
Second? Comfort. The upholstery in 1059 may’ve kinda lasted/survived this long. . . but for sitting in? ---- these seats are done. Especially the driver’s. Not only is/are the stuffing smooshed/springs baggy/mounting-points wiggly, but the a$$-prints left by All Those Who Came Before Me just don’t match mine. I’m already a bit tall for the car as it is --- hafta kinda lower my head/stoop a bit in the seat anyway, just to see clearly + keep my head off the head-liner --- basically? I don’t fit . . sometimes, I feel like a bear riding a bicycle. So now, on top of that? . . . having to skootch my posterior forward to get somewhat-uncertainly situated in the pre-existing butt-pocket in the seat?, slouching all the while? --- No. I’m done contorting. And I just put a really nice Recaro in my Every Day, too. I’d like to feel that good/secure in 1059. So. I want to have a proper/in-period + comfortable + steady chair to drive from
Third? Weight. I don’t know what Porsche’s regular seats weigh but I’ve changed-out the stockers on a few other cars and have always been impressed by how really really heavy factory stuff is. So, all the bits I’ve collected are lighter . . .
seat = 12.2 lbs/5.6 kg
sliders = 5.4 lbs/2.5 kg
bracket = 6.6 lbs/2.9 kg
total = 24.2 lbs/ 11.0 kg
1) thru 4) The Last Bit . . . from Goodie Box to detail pics
5) Another shot of the sliders. Despite appearances, NOT aluminum --- at least, according to my magnetic screw-driver. Only the outside of the outer (left-hand) rail has the slots for the adjuster to 'bite' . . .
Last edited by LongRanger; 05-29-2012 at 05:12 PM.
After Uli’s last package showed up, I waited for the rare/endangered free week-end, then headed on over to the car, laid-out all the bits . . . . got started
Moment of Truth No 1 came after I’d un-packaged Uli’s console/bracket, then matched it up with/fit it to the sliders. The console/bracket’s hardware was included, so I could actually bolt everything up. Would everybody fit? . . .
Yup. Really-really good, actually. Like they were made for each other . . . neissenteit --- Old German term
Now I had to see if the console/bracket would fit 1059’s floor. Time to take the seat out
Before getting too carried away, I did a search, here --- on The Registry --- on how to remove a seat . . . I really have no idea what I’m doing so, before the bits started flying, I wanted to see if there were any threads w/ pictures + instructions + helpful hints + tools required, etc to be found on the topic. Found this . . .
http://www.early911sregistry.org/for...=removing+seat
OK. Saw how the stock seat was attached to the floor --- 8 allen-head bolts/ 2 per corner --- then looked for + found them in the car --- looks easy enough
Next were the seat-belt anchors, three? Found those all on my own. One was up on the B-post, the others on the sides of the seat ---- wuhp . . . hey, wait a minute. The factory seat belts are attached to these brackets that, in turn, look to be attached to the seat somehow --- not the floor. And neither the seat nor the console/bracket that I wanted to swap in had anything that looked like I could anchor a seat-belt to, so . . . .
. . . Note to Self: where/how do the seat-belts re-attach?
Took attendance of what stuff I wanted/needed to detach --- allen-head bolts for the seat, big-a$$ hex-bolt for the B-pillar anchor --- then made a list of tools + stuff . . . Liquid Wrench, allen-head sockets (never had any), coupla wrenches --- metric all. Quick trip home (wrenches), then Home Depot down the street (everything else, ~$23), back to the car
Started out as an easy job. Mostly. No Liquid Wrench . . . only found some new soy-based product (!) Worked, though. Coupla squirts and the allen-head bolts holding the OG bracket to the floor came right off. The B-pillar bolt holding the shoulder belt anchor didn’t need anything special, so that came right off/out. Both lap belts were attached to/came out with the seat. Heavy sucker, too, and --- because the seatback doesn’t lock --- a total PitA + back to extract + maneuver out
With the car’s floor clear, I was pretty anxious for --- MoT No 2 . . . . would Uli’s console/bracket fit 1059’s floor?
Youbetcha, uh-huh. Neissenteit. Even took all the same hardware to attach, lined-up all the slider mounting holes with the console/bracket, then dropped the whole sha-bang on to 1059’s floor mount-points. . . and everything fit --- except for one hole that was just a little off, cocking the mounting bolt ever-so slightly --- enough to keep it trying to cross-thread, so I made another . . .
. . . Note to Self: add some clearance to that hole
I’d made a couple phone calls about the seat belts and how to anchor ‘em. Got some part numbers, different/conflicting suggestions on how to proceed . . . along with an earful about how lousy/miserable/worthless Porsche’s non-retracting seat belts are --- which of course I’m now even more totally in love with because of their miserableness
On 1059’s original chair, Porsche attaches the seat-belt anchors to the outer underside of the seat, between the seat base and the slider . . . wedged-in kinda, between/behind the seatback hinge, too --- same type/size of socket-head bolts as are used to attach the OG console/bracket to the floor. Or . . . at least they started out that way. 1059’s seat hardware had been kinda Hillbilly’d at some point --- extra washers, hex- (instead of socket-) head bolts, big wood screw . . . . kind of a mini-cluster
Luckily, I had the seat all the way outta the car when these custom touches turned-up. And --- stunningly --- every kooky bolt + screw + washer + slider + bracket + etc came out without any drama
And, after seeing what I’d been sitting on, all this time --- well . . . that poor/sorry original chair was no way/never/so-NOT going back in. Point-of-no-return
1) Soy-based penetrating oil --- now I really have seen + heard everything . . . life-time supply, from the size of it. (Do I need to put this in the fridge? . . . so it stays fresh?)
2) and 3) Old and New. Looks like a Kid Seat, huh? . . . but these pics kinda exaggerate the size differences --- and w/sliders, the Scheel isn’t that much lower. On the other hand, it is cosmically/comically lighter. Funky crease in the Scheel's upper upholstery is from storage
4) Two Moments of Truth . . . sliders fit the console/bracket . . . and console/bracket fits the floor . . . neissenteit
5) Hillbilly’d hardware
Last edited by LongRanger; 05-29-2012 at 07:55 PM.
I remember John telling me about some of the funky hardware he'd found when he was taking 1059 apart for the re-spray . . . .
1) More non-standard (?) hardware attaching the outer slider (and seat-belt anchor and seat stop) to the stock seat. Luckily, not only did these bolts have the same/correct threads . . . but they would come in most handy/useful, later. Note the sheared-off (not by me) fastener @ the seat-back 'stop''s lower attachment point
2) Misc hardware . . . . wood screw (!), machine screw, and some kinda self-tapping metal screw --- which looked to be OG (?)
3) Post-disassembly. Here's the anchor bracket detached, laid over the hinge (vs behind, when properly assembled) --- the stock slider w/ all attendant hardware removed, 'stop,' too, seat belt cover laying next to the receiver
4) Pre-disassembly pic showing the right (inner) side of the OG seat. In the middle is the large chrome-covered hinge for the non-latching seat back. To the left is the seat-belt anchor bracket and, continuing left, the seat-back's 'stop.' The stock sliders are attached to the OG seat from below . . . but note the 'extra' washers . . . intended to raise the seat a bit?
5) After all the other bolts came out, I needed to line-up this access hole to get at The Last Bolt --- to remove the sliders from the stock seat, scavenge the hardware
Last edited by LongRanger; 05-30-2012 at 05:06 PM.
Some more miscellaneous stuff . . . . that I don't ever expect to see again
1) Original floor bracket . . . this is what the console/bracket bolts into . . . nicely-finished gloss black
2) Outer Scheel Ltwt Slider test-fitted, bolts-in-place --- save one . . . needing/awaiting tweaking
3) Console/bracket detail. All the fasteners that I would need either came with the bits I got from Uli + Gerrit, or were scavenged from what was already on the car. These c/b mounting holes were already tweaked . . . and I would oh-so-gently tweak one other
4) Outer Scheel Ltwt Slider fitted to seat . . .
5) . . . with these --- some kind of self-tapping screw, affixes to the wood runners on the outer edges of the seat bottom. Note --- these 4 bits represent 50% of the holding power of the seats attachment to, well . . . the car. Courtesy of Gerrit
Last edited by LongRanger; 05-31-2012 at 11:28 AM.
Once I got the Old Seat out, I took a good look at how the stock seat-belt anchors attached. Removing the stock sliders from the seats provided access to what looked like the same-style allen-head bolts that held on the anchors, so? . . . pulled them off
Fiddling around with/figuring out how all the various/sundry bits went together, I got a little caught up with how to proceed. Weld some tabs onto the Uli’s console/bracket? I’d seen these sorts of anchors done with/on some of the other after-market seat installs I’d done before
But do I really wanna eff-around with a weirdo/maybe-one-of-kind bit. Answer? . . . do you really have to ask?
Talking all this over w/ Marco @TLG, he’d described some post ’72 standard Porsche seat bits that could be bolted-in. Another possibility
Then I thought that maybe I could kluge up some kinda angle-iron bracket, drill some holes, re-attach the factory seat-belts, etc --- roll my own . . . the $200 mouse-trap approach. Oh yeah --- that’s appealing
Then . . . looked at the anchor brackets that I’d pulled off the stock seat . . . looked at the spacing of the bolts that attach the console/bracket to the floor . . . compared those mounting points to the spacing of the anchor’s mounting holes . . . . maybe, 7 – 10 mm’s difference? . . .
Hmm. By adding a little relief/notch to stock anchor brackets . . . . I was pretty sure that I could modify/re-use/attach the existing brackets and their belts, to the same attachment points as the console/bracket
Trip to Sears, South Coast . . . 3-pc file set, $23.69
1) Final outer-front c/b installation --- re-using old allen-head bolts + lock washers, new washers . . . maybe 5 ft/lbs
2) and 3) Rear c/b attachment detail . . . look closely and you can see the hand-done 'relief' made to the seat-belt anchor bracket's mounting hole, so that the c/b's mounting bolts will clear --- maybe 5 min/per
4) Final outer-rear c/b + seat-belt anchor bracket installation . . . and everything clears
5) Final inner-rear c/b + seat-belt anchor bracket etc . . . ditto
On these last two pics, notice that the fasteners used here are hex-head --- not allen-? These are the non-standard bolts from post #355/pic #5, above --- only re-cycled. Same threads as the 'correct' allen-head --- just hex- . . . and about twice as long. Fortunately. 'Cause, by the time I'd added the thickness of the seat-belt anchor bracket, and a coupla washers --- regular & lock --- the 'correct' bolt would've been running a bit short of threads. So these longer 'non-standard' ones worked-out perfect. Lucky
Last edited by LongRanger; 05-29-2012 at 09:11 PM.
Here's the final 'fitting' . . .
Sliders fit the c/b? . . . check
C/b fits the floor? . . . check
All seat-belt anchor brackets tweaked/fitted/secured? . . . check
Seat belts re-assembled in the car/latched/clearances checked? . . . check
All that's left? . . .
. . . oh yeah --- the seat!
I’d held off attaching both sliders to the seat. I’d already measured/compared the distance between the mounting holes under the seat with those on the sliders, as mounted on the c/b. Both = 15 7/8”. Amazing. So amazing that I did it twice. I mean, as far as I can tell, these parts were never even near each in the last 4 decades --- and yet, they fit like that? Lucky . . . scary lucky
As far as how I was gonna finish everything, I’d decided to attach the c/b to the floor, affix the sliders to the bottom of the seat, then twingle the seat + sliders to fit on the mounted c/b --- only 4 bolts/lock-washers/washers to deal with, plus . . . the seat + sliders were light, easy to maneuver, padded . . . mostly
So. Took the sliders apart --- separated the top/bottom halves, so I could access the mounting holes --- fastened both top halves to the seat bottom, using the hardware supplied by Gerrit, then re-joined the sliders bottom halves
Next. Took the c/b + hardware completely out. Bronze-brushed all the threads of all the bolts, applied some bicycle-chain lube --- stickier/gluier/won’t ‘travel’ so much --- then carefully seated/tightened/re-tightened all the hardware
Got the seat + sliders, maneuvered everybody into position on the mounted c/b, lined-up the holes, put in the bolts + lock-washers + washers, one-by-one . . . . done
Maybe ten minutes
Two more (yes --- I am an idiot) trips to Home Depot --- better stainless steel hardware --- brush/lube/tighten/re-tighten the sliders-to-c/b hardware --- and now? . . . .
. . . really done
Jump in --- try ‘er out for size, and? . . . . .
Nice. Higher then I would’ve thought, especially after seeing it sitting next to the stocker. Adjusted the sliders down one notch . . . can’t get down to the very last one, but . . . better
The Scheel kinda lays me back in the car --- I prefer more upright, closer, steering wheel in my chest . . . here, it’s more of a reach, but still comfortable, and my knees clear the wheel better and the shifter's handier, too. Also, Old School buckets grab/hold me by my butt --- and tightly --- vs thighs + shoulders like modern seats do --- like the Recaro SPG in my Every Day. I don’t miss the headrest . . . although I’m well aware that its not there
OK . . . Time for a ride
Scheel is cushy --- all the padding is noticeably mooshier, but, being WAY more securely tied into the car . . . . with all the wiggle/rocking of the old seat gone . . . ride's actually better
Also --- Scheel is small --- a bikini of a seat. My 33”-waisted butt tucks in nicely, prolly better-so, over time, after some breaking-in/bigger miles. But . . . . no Big Boys in here
This is sooooo My Car . . . .
. . . . neissenteit!
1) All in. 11 cents. Tools/etc scattered. And Pilla cheering
2) . . . and speaking of tools/etc --- from the left . . .
--- 1. Gentle Persuader, for maneuvering the sliders on the c/b
--- 2. stainless washers + lock-washer, sliders @c/b
--- 3. Maglight
--- 4. 3/8" drive socket wrench + 2" ext + 5 mm allen-socket, for standard allen-bolts
--- 5. screw driver w/ 10 mm socket, for non-standard hex-bolts attaching the rear c/b-cum-seat-belt anchor brackets
--- 6. 13 mm wrench, for c/b-to-slider bolts
--- 7. 17 mm wrench, for seat-belt anchor bolt @ B-post
--- 8. Bronze wire brush, for cleaning bolt threads, etc
--- 9. (Too) big rat-tail file, for opening c/b mounting hole + notching seat-belt anchor bracket mounting holes
In the upper portion of pic . . .
--- 10. (yellow bottle) bicycle (MTB, here) chain lube, for bolt threads
3) Tools/etc cleared
Last edited by LongRanger; 05-31-2012 at 11:30 AM.
Sweet!!!!?
63 356 B 2.1L Outlaw
75 911M 2.7 MFI
86 Sport Purpose Carrera
19 991 S
 Posting Permissions

 Reply With Quote